
In this guide we are going show how to Integrate WhatsApp into Zoho Desk or virtually into any email based ticketing systems like Zendesk, Gmail, Help Scout, Spiceworks, Hubspot, osTicket, Servicenow, ConnectWise, Jira , HelpJuice, Freshdesk etc.
Prerequisite
- WhatsApp Channel Enabled Picky Assist Account
- Access to Picky Assist WhatsMail Adon
- Zoho Desk Account with Admin Privilege
Capabilities
Once the integration is completed you will able to do the following activities through Zoho Desk
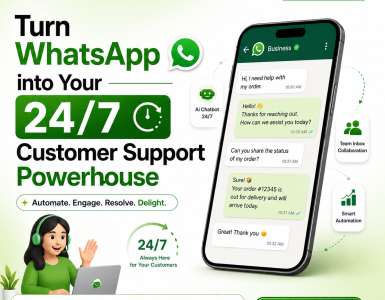
- Automatically create Tickets in Zoho Desk when someone sends a WhatsApp Message to your Connected Number with Picky Assist
- Creating Tickets conditionally with Smart Replies to reduce the count of tickets i.e you will able to automate the frequently asked questions using the Smart Replies and tickets will get created only if the smart replies not able to understand the customer query or based on certain keywords defined by you like “help” etc.
- Ability to automatically send a WhatsApp reply with the Ticket ID when the ticket is created
- Support team can reply to the tickets as normal and we automatically convert the reply and send it via WhatsApp
How it Works
Picky Assist makes use of WhatsMail Adon to integrate with Zoho Desk. You will have the option to configure your Zoho Desk email with Picky Assist WhatsMail Adon and whenever we receive a WhatsApp message we will forward the message to your Support Email address
We generate a unique email address for each WhatsApp number and use that email address as the from address, so whenever the support agent replies to the ticket from Zoho Desk, we receive it’s in our email server then we extract the email body and attachments if any and send it to the respective WhatsApp Number.
Getting Started
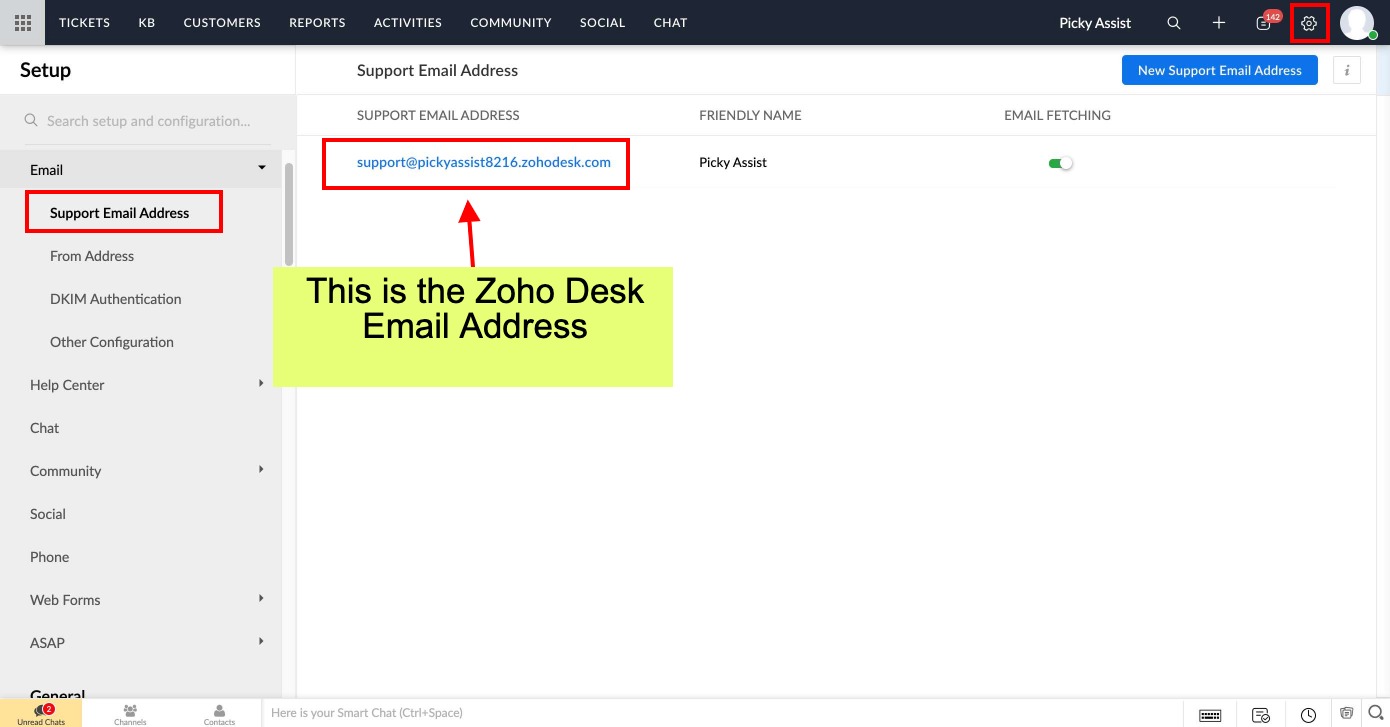
The very first step is to get your Zoho Desk email address, to get this please login into your Zoho Desk then navigate to Settings -> Channels -> Email and from there you can copy the email address which you want to use with Picky Assist as shown below;
Configuring with Picky Assist WhatsMail
Now we need to paste the email address into the Picky Assist WhatsMail Settings, to do this kindly login into Picky Assist Account -> Settings -> App (Tab) -> WhatsMail -> Settings, and a popup will open as shown below;
Selecting Channel
Channel helps you to forward the incoming messages only from the selected channel to your Zoho Desk, if you want to forward messages from multiple channels then please select it accordingly as shown below;

Push Action
The next setting is to configure whether to forward all messages to WhatsMail or you want to make use of our Smart Replies, if you want to create a ticket only if the smart reply not able to solve the customer query then you have to select Push Action as “User Smart Replies” and if you want to send all WhatsApp messages to your Zoho Desk then select “Send All Messages to WhatsMail”

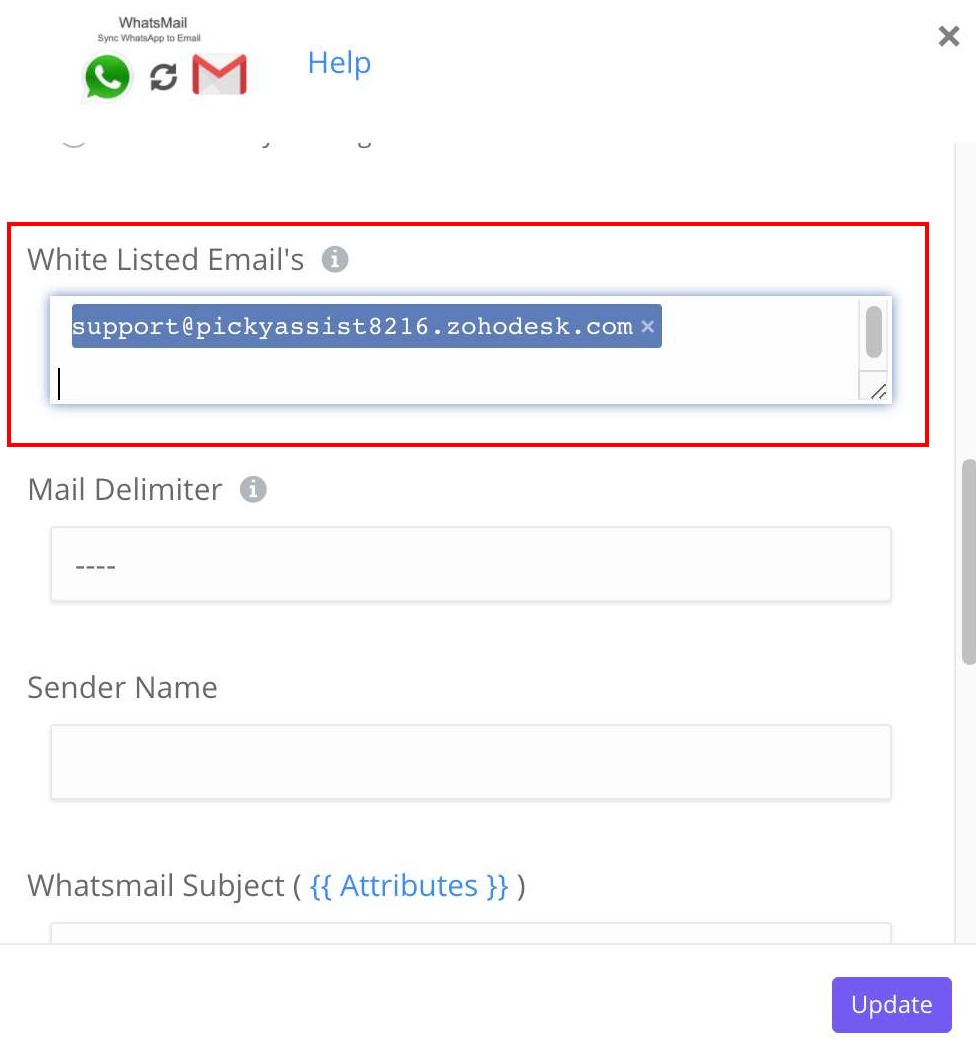
White Listed Email’s
This is where you need to input your Zoho Desk email address which we copied earlier from Zoho Desk, please use enter to input multiple email addresses. We will forward all WhatsApp messages received to these email addresses.
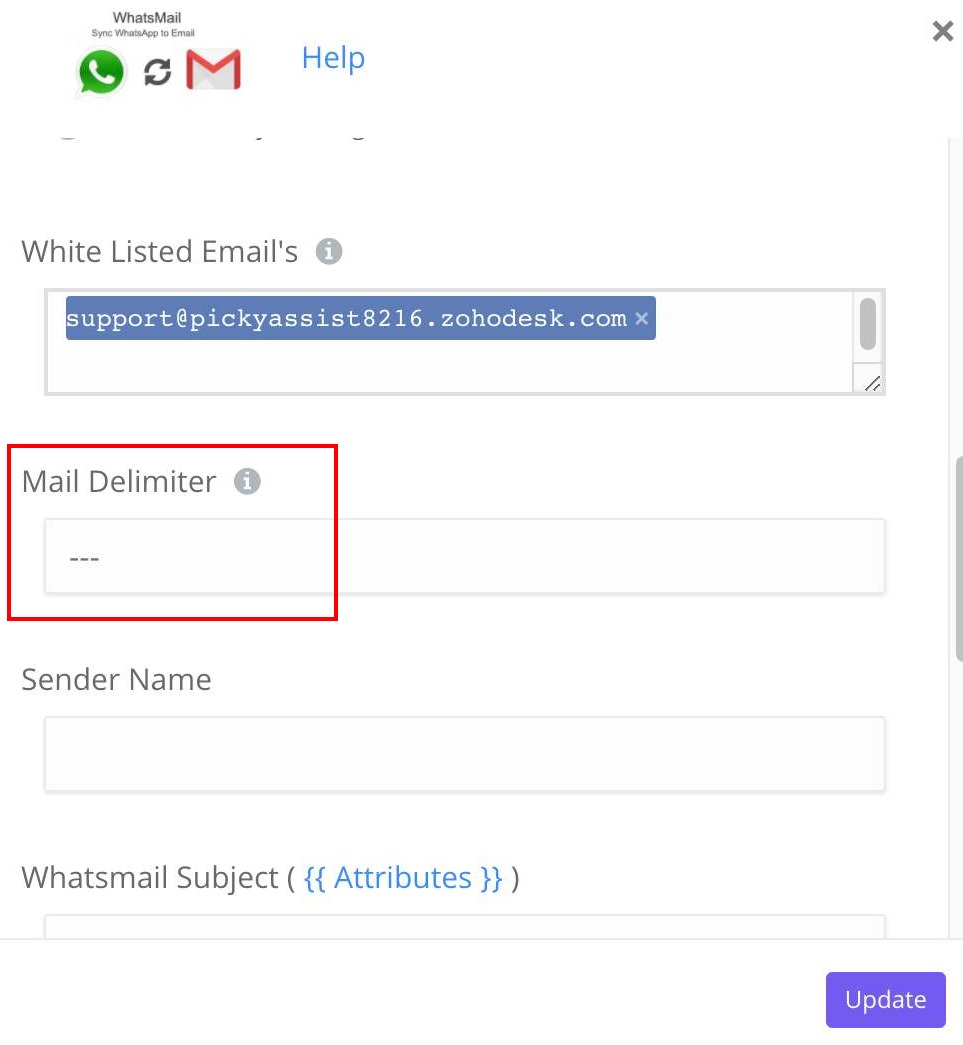
Mail Delimiter
The email delimiter is a line of text used to inform the email recipient that any text entered into a reply must be above a certain line in the email.
When the recipient’s reply is received in various email application / support desk software the delimiter is used to separate old content from new. The new content is added to the ticket as a comment.
You can set delimiter as a unique text a combination of special characters and text is recommended, few examples as below;
—————–Reply Above This Line———————
#####——Reply Above This Line—–
Zoho Desk Default Deimiter
The Zoho Desk default delimiter is — until you customize this with your email signature if you have enabled the email signature then make sure you have added — before the email signature
First setup the delimiter as shown below;
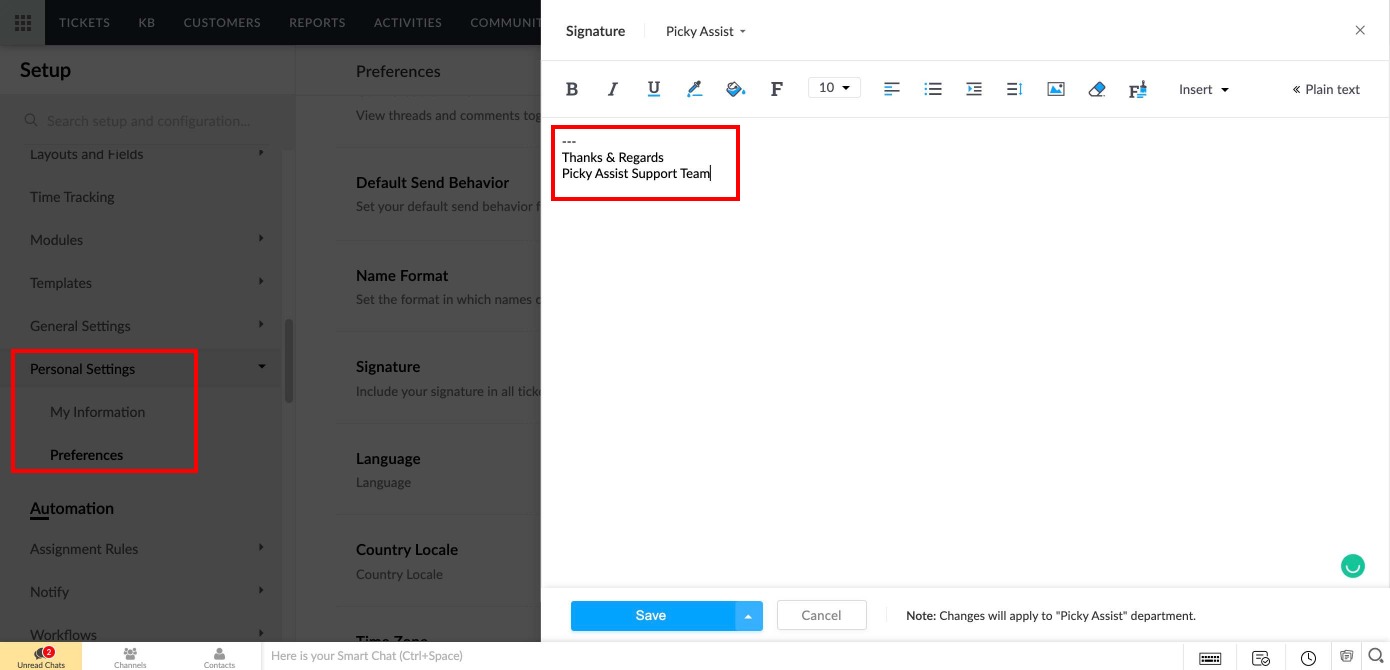
Email Signature in Zoho Desk
If you have enabled the Email Signature then make sure all the agents added a prefix — before their email signature as shown below;
You can setup the email signature from the Zoho Desk -> Settings -> Personal Settings -> Preference
WhatsMail Subject & Message Body
This settings helps you to customize the Email Subject & Body which used to send an email to your Zoho Desk when a WhatsApp message is received in your Connected Number.
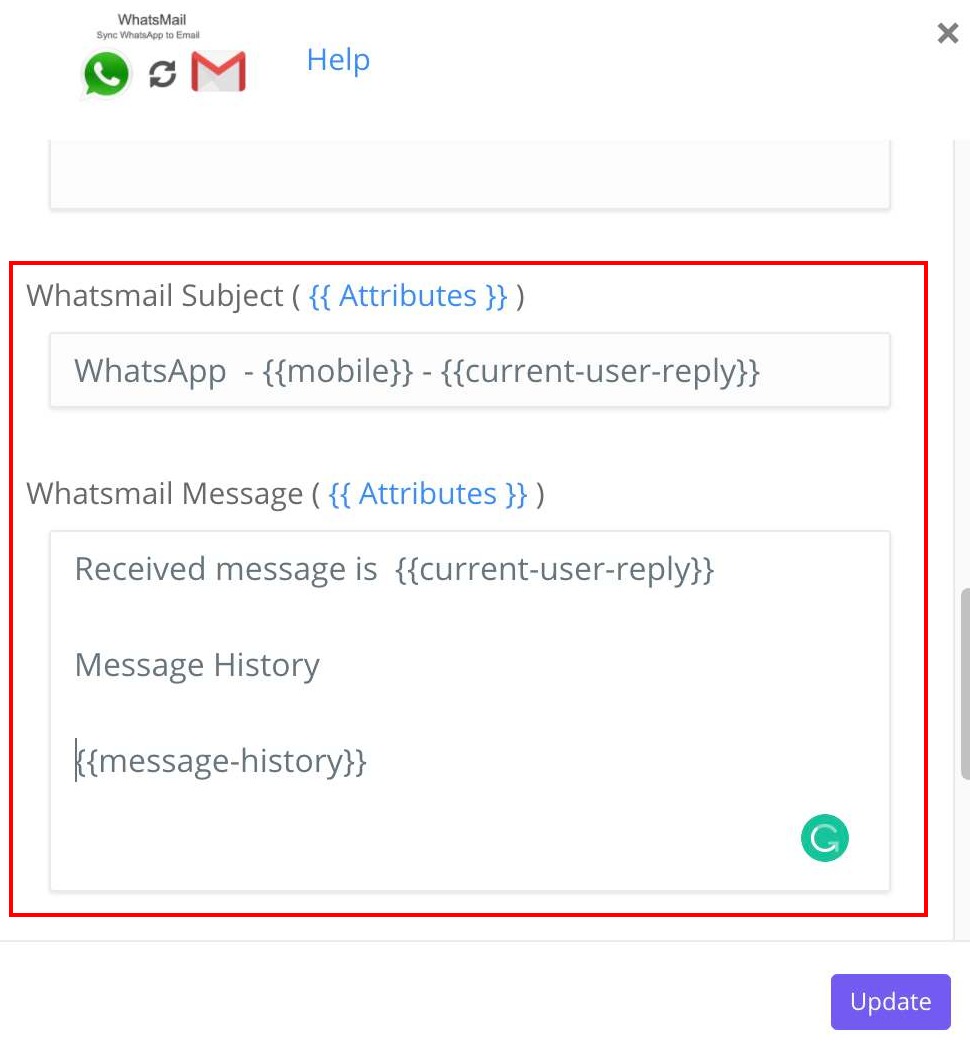
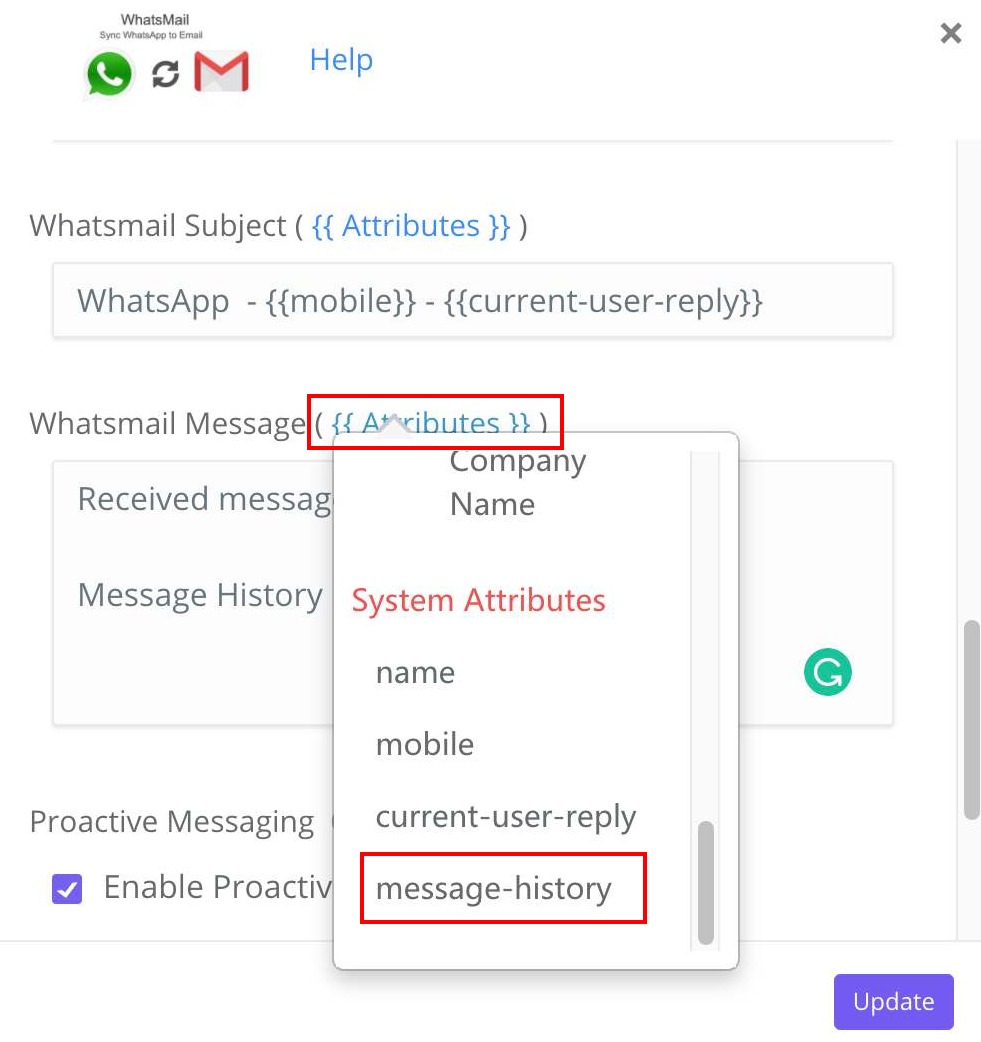
Personalizing Email Subject & Body with Attributes
Please make use of the “Attributes” to insert the values like Name, WhatsApp Number, Last User Reply, Message History etc as shown below, this helps the support team to understand the context in a better way
Proactive Messaging
Proactive Messaging helps you to create a ticket for a WhatsApp Number right from the Zoho Desk, like a compliant received through Call or any other mediums.
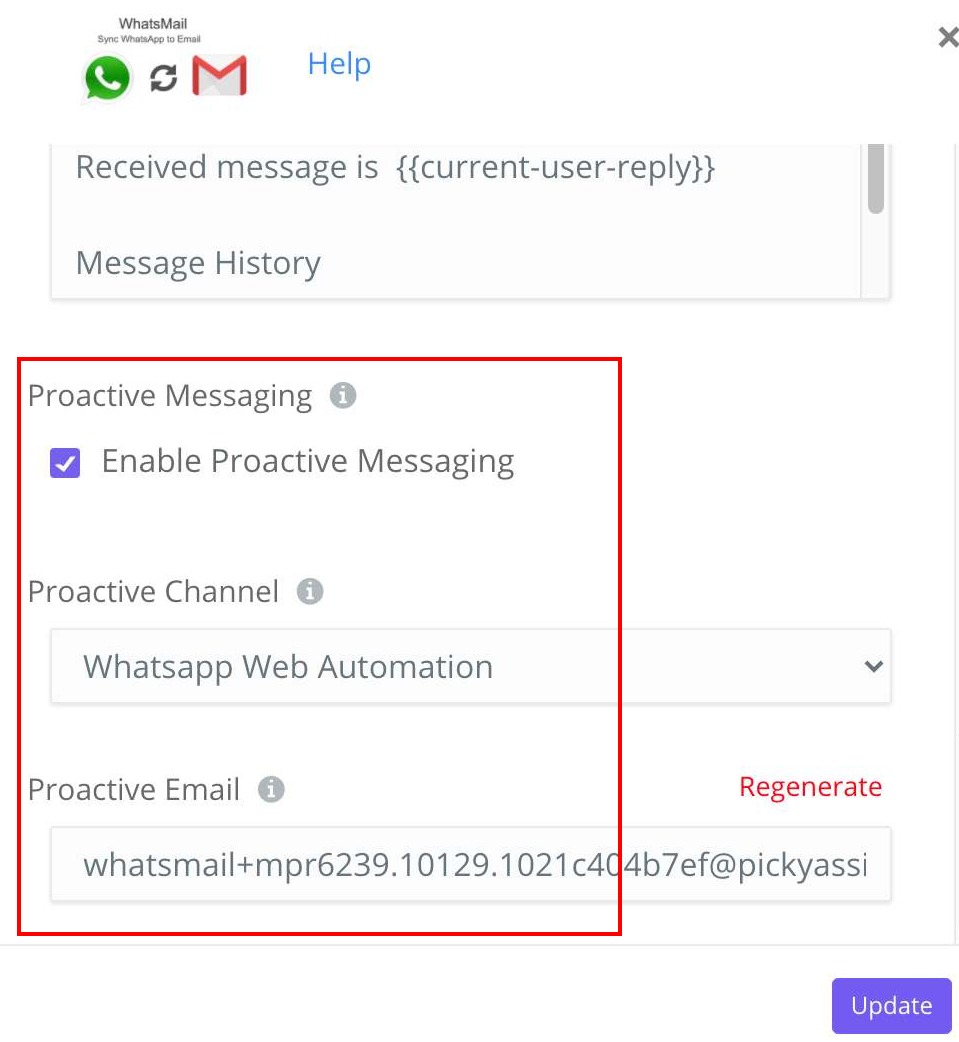
Email : You should use the email address as shown in your Picky Assist WhatsMail settings under “Proactive Messaging” section as shown in the above image.
Subject: The subject of the ticket should be the WhatsApp number of the customer followed by the Country Code, make sure you are passing the country code without 0 or +
Description / Message Body: Please make sure the description or message body is set to plan-text as many formatting is not supported by WhatsApp like font color, background color etc
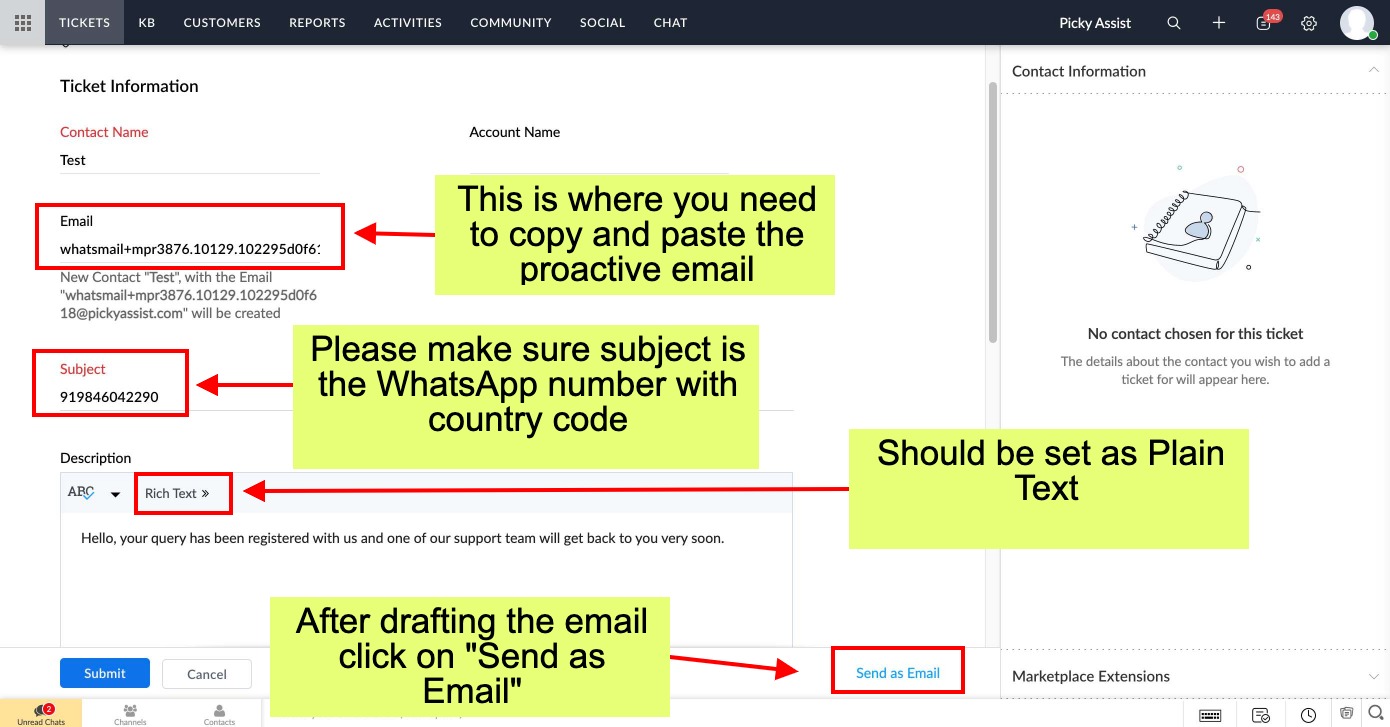
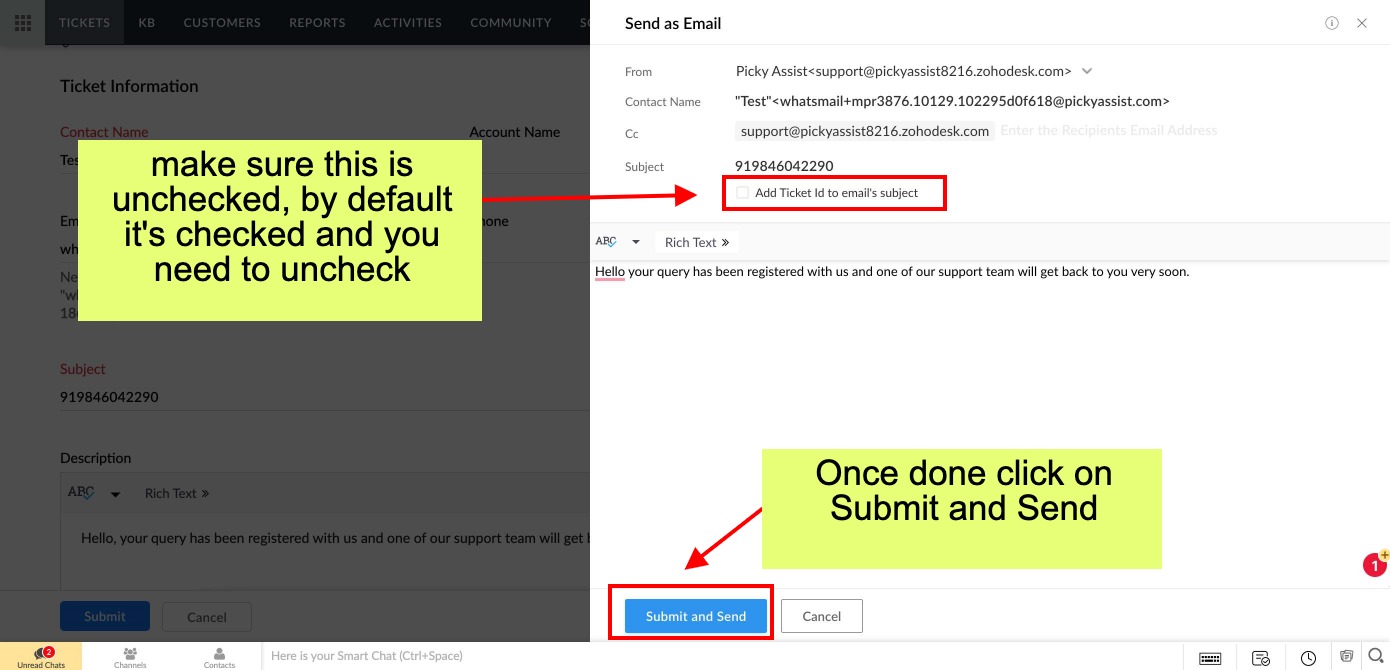
Please note that by default sending an outbound email is not enabled in the Zoho Desk you need to enable this before start using this feature. Read More

Add comment