In this guide, we are going to explore the possibilities of WhatsApp Integration with ActiveCampaign using Picky Assist Connector.
Pre-Requisites of WhatsApp Integration with ActiveCampaign
- WhatsApp Channel Enabled Picky Assist Account
- Access to Picky Assist Connector
- ActiveCampaign Account with Admin Privileges
About ActiveCampaign
ActiveCampaign is a category-defining Customer Experience Automation Platform that helps over 130,000 businesses in 170+ countries meaningfully connect and engage with their customers. It creates optimized customer experiences by automating many behind-the-scenes marketing, sales, and support processes.
Capabilities with Picky Assist Connector
When you connect your ActiveCampaign platform with Picky Assist Connector you can achieve below mentioned capabilities to enhance your communication with your customer’s
- Send A WhatsApp Message When A Campaign is Opened / Clicked
- Send A WhatsApp Message When Deal Added or Deal Status Changed
- Send A WhatsApp Message When an Email Get Reply
- Start a WhatsApp Drip Campaign When a Link is Clicked / Added
- Integrate with ActiveCampagin Workflow Automation to Perform Advanced Actions
- Send a WhatsApp Message / Start a WhatsApp Drip Campaign When an Abandon Cart is Recorded in the Connected E-commerce site with Active Campaign
- Send a WhatsApp Message / Start a WhatsApp Drip Campaign when a form is filled and submitted.
Primarily you will able to take actions/perform condition in the Picky Assist Platform when any of the below events happens in your ActiveCampaign Platform, below are the list of events ActiveCampaign Supports now
- Campaign forwarded (through the ActiveCampaign forward link)
- Campaign opened
- Campaign shared (to Facebook or Twitter)
- Campaign starts sending
- Contact added
- Contact note added
- Contact tag added
- Contact tag removed
- Contact unsubscription
- Contact updated
- Deal added
- Deal note added
- Deal pipeline added
- Deal stage added
- Deal task added
- Deal task completed
- Deal task type added
- Deal updated
- Email bounces
- Email replies
- Link clicked
- List added
- SMS reply
- SMS sent
- SMS unsubscribe
How WhatsApp Integration with ActiveCampaign Works with ?
Picky Assist Connector makes use of the ActiveCampaign inbuilt Webhook module to listen the real-time event alerts from the platform and then based on the event type you will able to create a filter and relevant action to be taken.
Getting Started
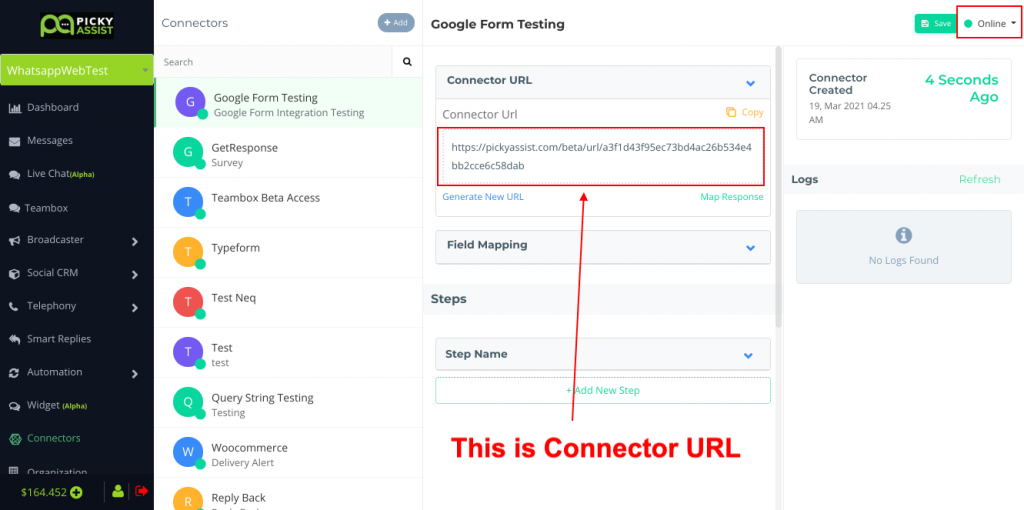
The first step is to go to Picky Assist and create a Connector URL, just make sure the Connector is in Online Mode to start accepting requests from ActiveCampaign whenever the subscribed event is triggered.
Setup Webhook in ActiveCampaign
There are two different places where you can setup a webhook:
- Developer Settings under My Settings
Will fire every time a specified action(s)/event is completed - Webhook automation action
Will fire only when a contact completes the webhook automation action step. You do not need to create a webhook under “Developer Settings” in order to fire a webhook from automation. Learn how to send a webhook from an automation.
Creating Webhook – Global
Now, we need to create a webhook for getting event updates, i.e whenever an event happens in the ActiveCampaign Picky Assist will be notified through Webhooks about the event and the Connector will perform the steps configured by you.
Login into ActiveCampaign Admin Panel Navigate to Settings -> Developers -> Webhooks as shown below;

Subscribing to Event Types
You have the option to subscribe only to the specific event type that needs to be sent to Picky Assist Connector, based on your requirements you can select the event type as shown below;
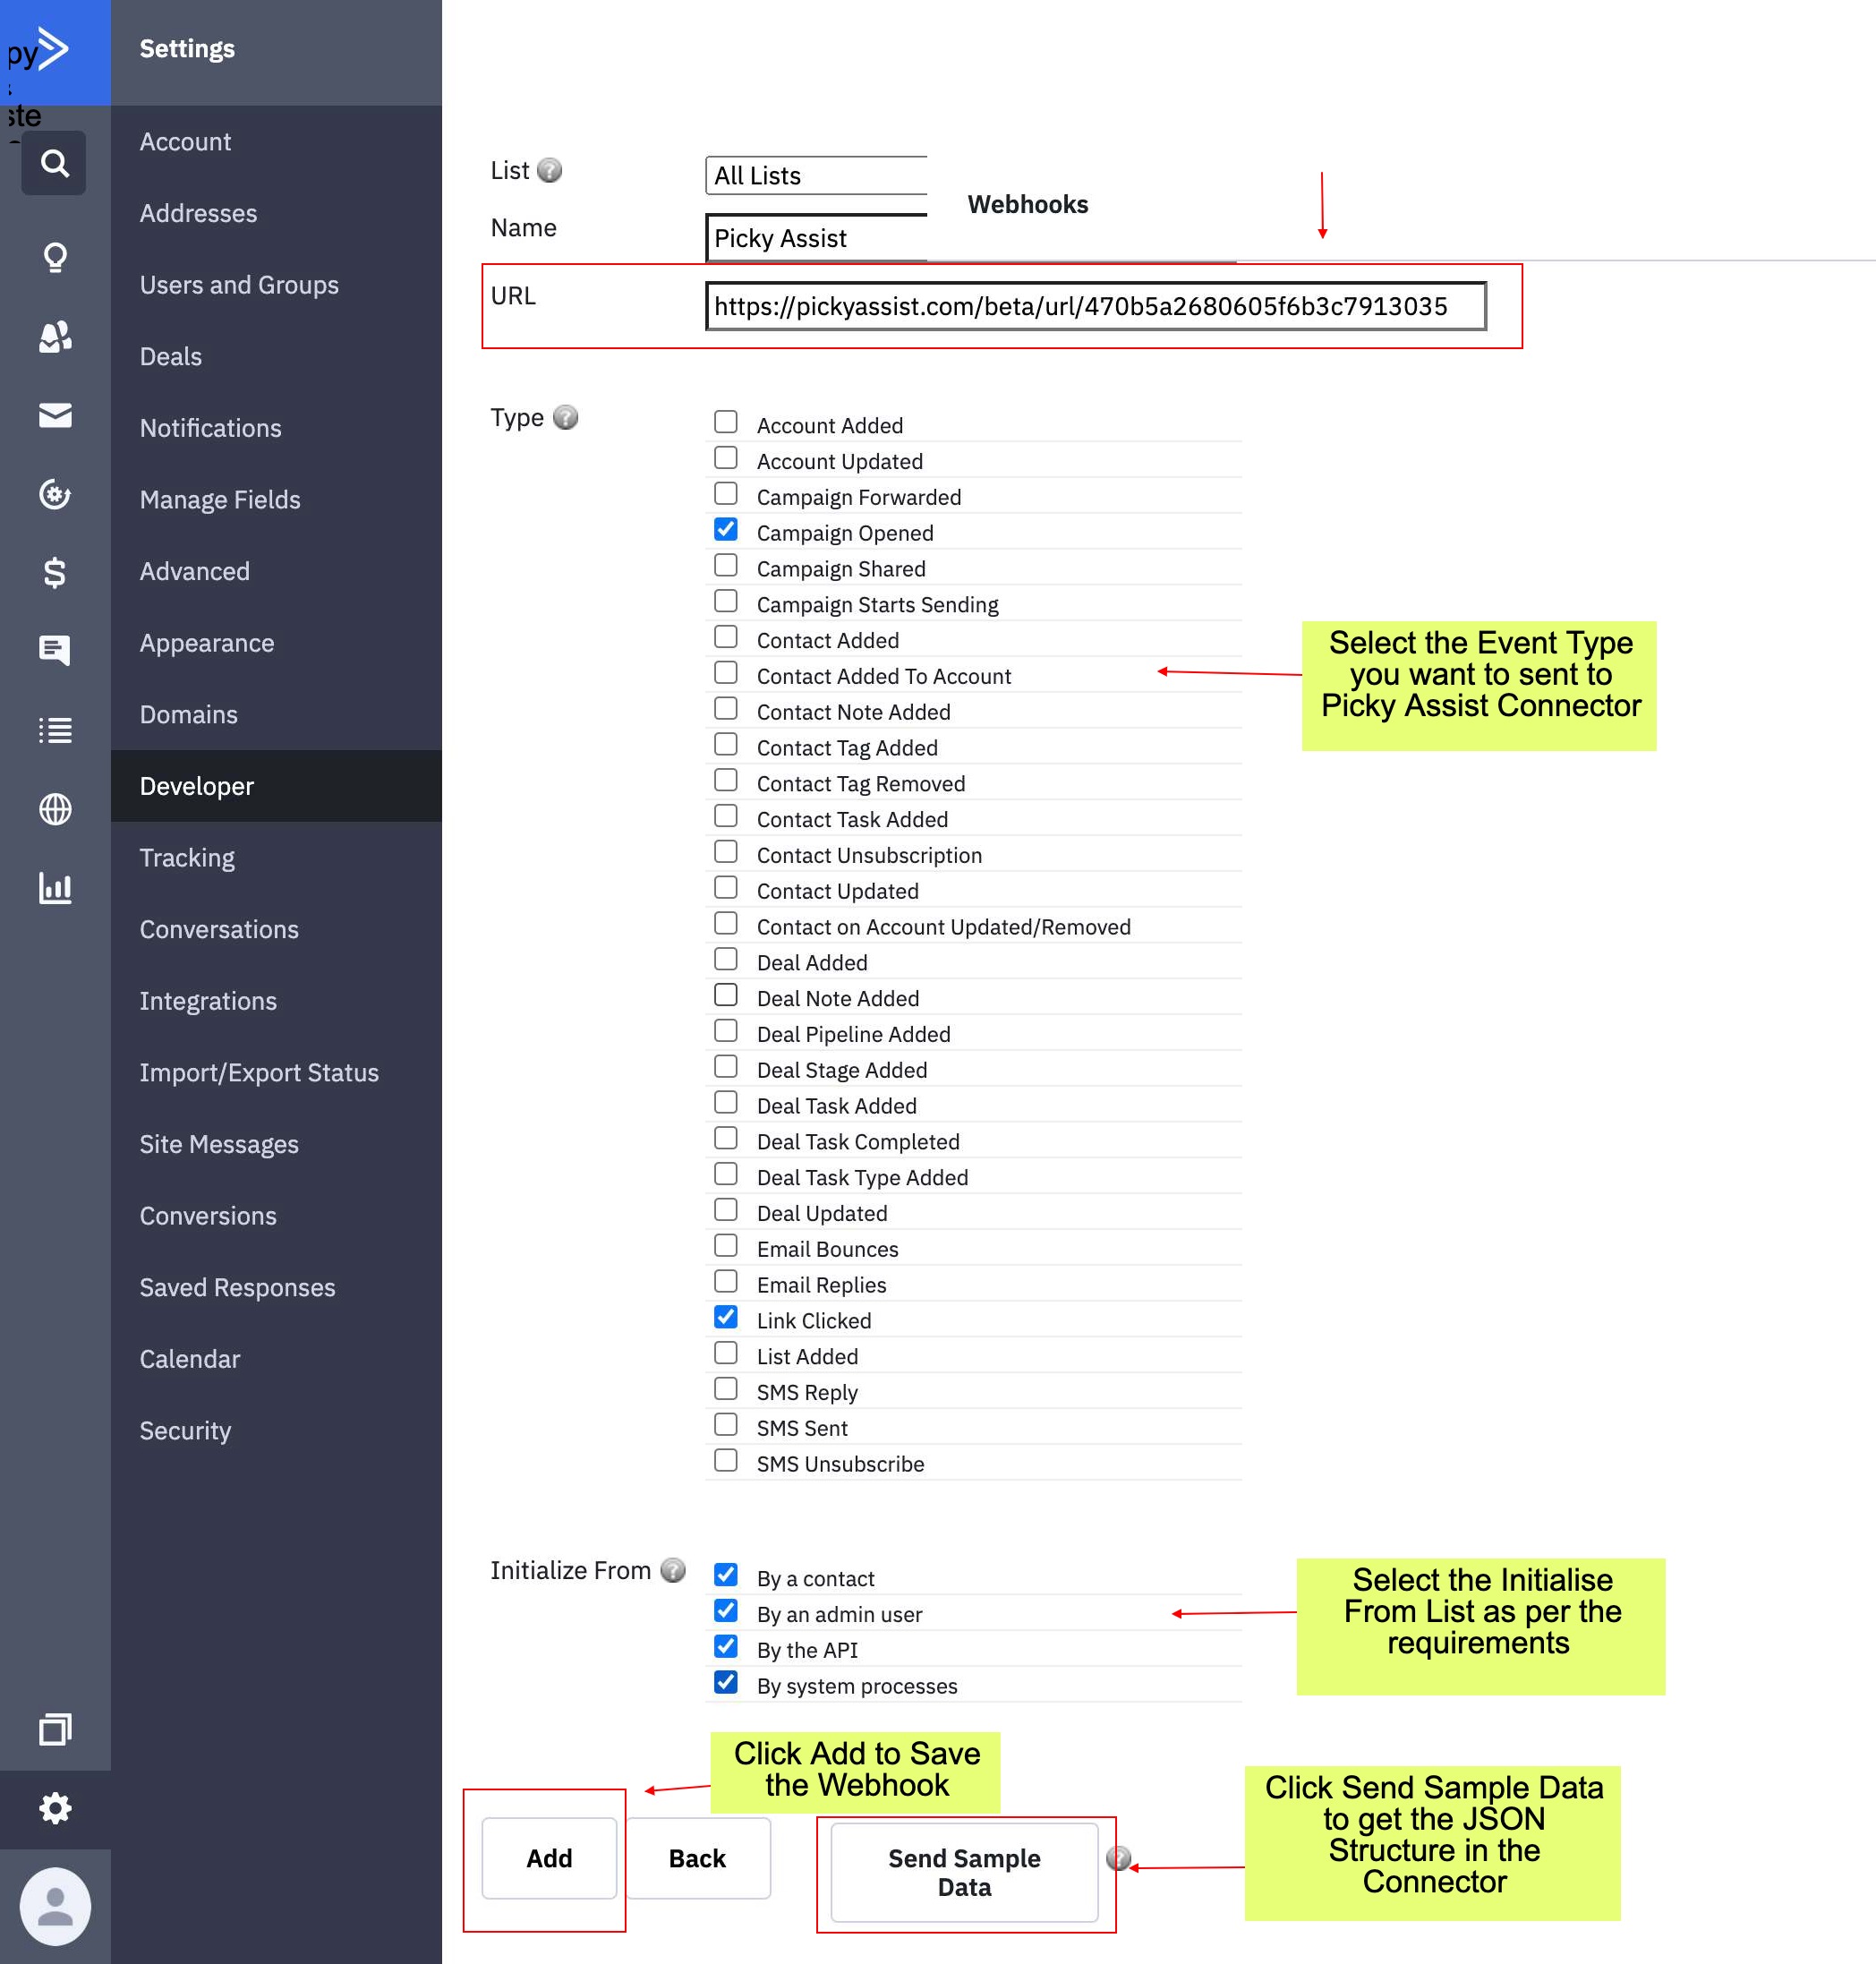
Initialize From
- By a contact – Runs when a contact causes the action (eg, subscribes, opens a campaign, etc)
- By an admin user – Runs when an admin user causes the action (eg, adding a contact from the admin area)
- By the API – Runs when API call causes the action (eg, adding a contact using contact_add API call)
- By system processes – Runs when automated system causes the action (eg, bounces, automation emails, etc)
You can subscribe to multiple events by creating more webhooks with same Connector URL or different Connector URL and make use of the Filter tool & Router to filter the event value and route to the right step or connector in the Picky Assist Connector as per your requirements.
Setting Up Webhooks in Automation
Will fire only when a contact completes the webhook automation action step. You do not need to create a webhook under “Developer Settings” in order to fire a webhook from automation. Learn how to send a webhook from an automation.
The “Webhook” action in an automation is located under “Conditions and Workflow.”
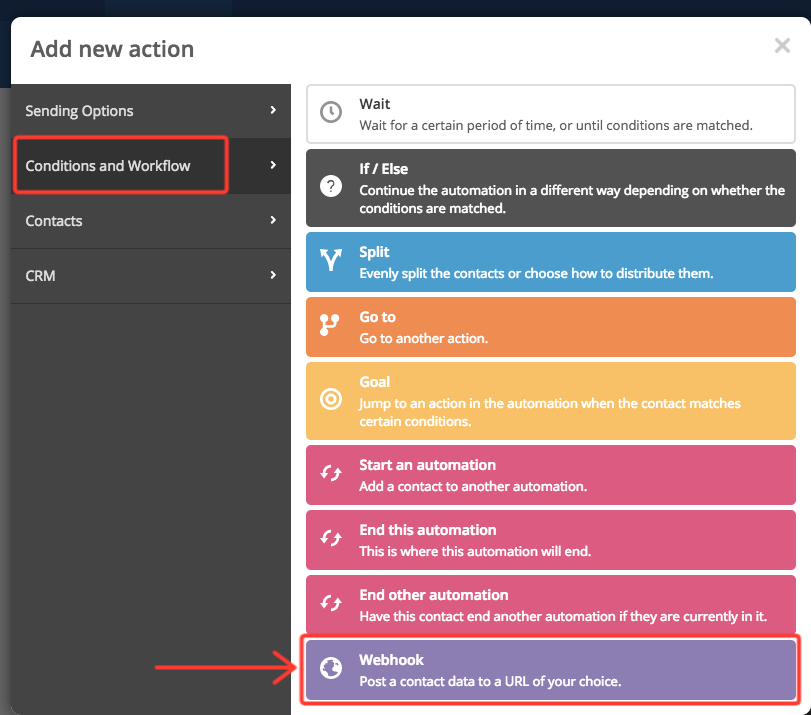
To add this action to your automation:
- Click on the node (+ symbol)
- Select “Conditions and Workflow”
- Select “Webhook”
- Enter the URL to post to
- Click “Save”
The type of contact information that is sent to your URL from a webhook automation action includes:
- First Name
- Last Name
- Email address
- Custom fields
- Tags
- Organization
- Phone number
- Contact ID
- IP address
- Series ID (Automation ID)


Add comment