In this guide, we are going to explore the possibilities of integrating Zoom Webinar using Picky Assist Connector.
Pre-Requisite
- WhatsApp Channel Enabled Picky Assist Account
- Access to Picky Assist Connector
- Zoom Webinar Paid Account
- Zoom Developer Account (Free to Create)
About Zoom Webinar
Zoom Webinar is a popular Webinar software used to share real-time live streams. It can be used to power remote live meetings, product demos, sales webinars, online lessons, onboarding sessions, more
Capabilities with Picky Assist Connector
When you connect your Zoom Webinar account with Picky Assist Connector you can achieve below-mentioned capabilities to enhance your communication with your customer’s
- Send Zoom Webinar Meeting URL and Information through WhatsApp.
- Send Periodic Meeting or Zoom Webinar Reminders through WhatsApp
- Sending Webinar Followup or Feedbacks through WhatsApp
How It Works?
Picky Assist Connector makes use of the Zoom Webinar internal app which make use of Webhooks to listen the real-time event alerts i.e whenever a new webinar registration is created in the Zoom Webinar platform we receive an event with all details and further you will able to perform different automations
Getting Started
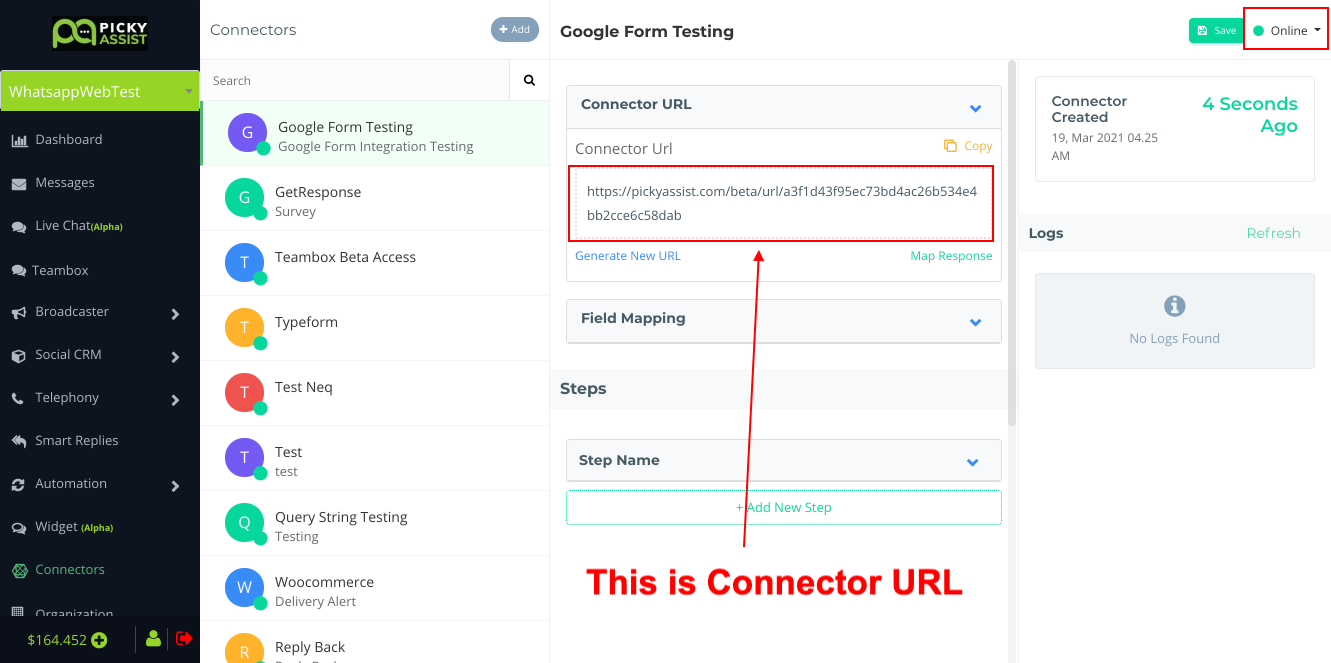
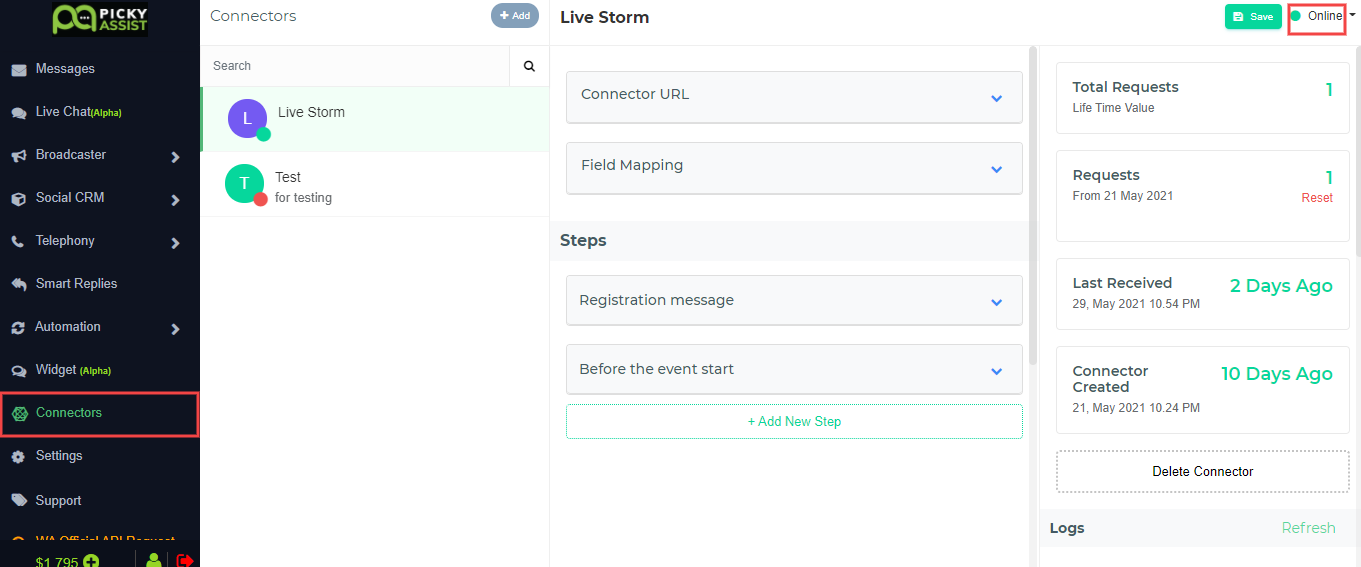
The first step is to go to Picky Assist and create a Connector URL, just make sure the Connector is in Online Mode to start accepting requests from Zoom Webinar whenever the subscribed event is triggered.
Creating a Zoom App
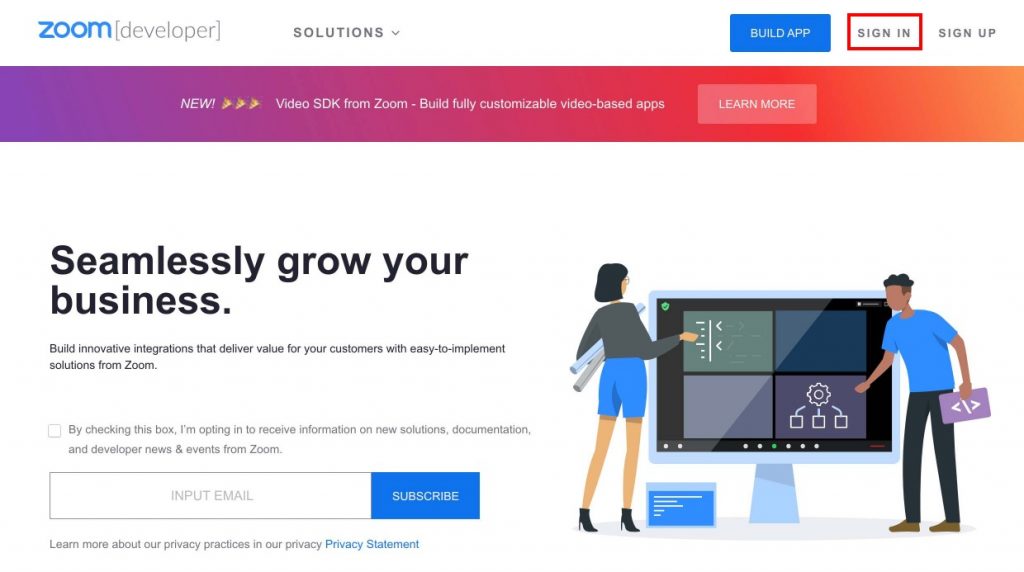
The very first step is to create a Zoom App which can be mapped or installed into your account, for creating an app you need to login into your existing Zoom Webinar Account then open their developer portal by visiting https://developers.zoom.us/
After login to the developer account then click on “Build App” button as shown below;

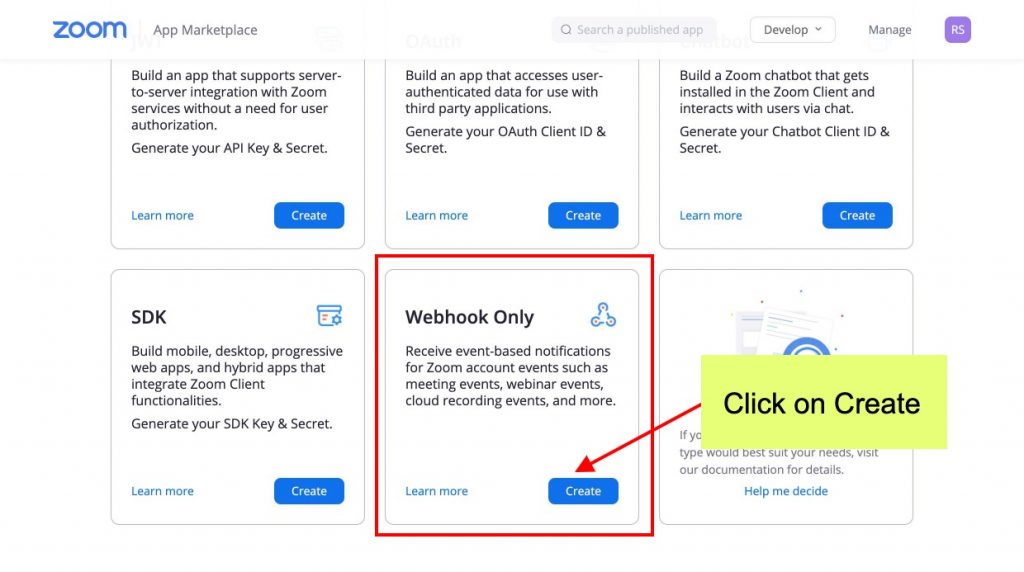
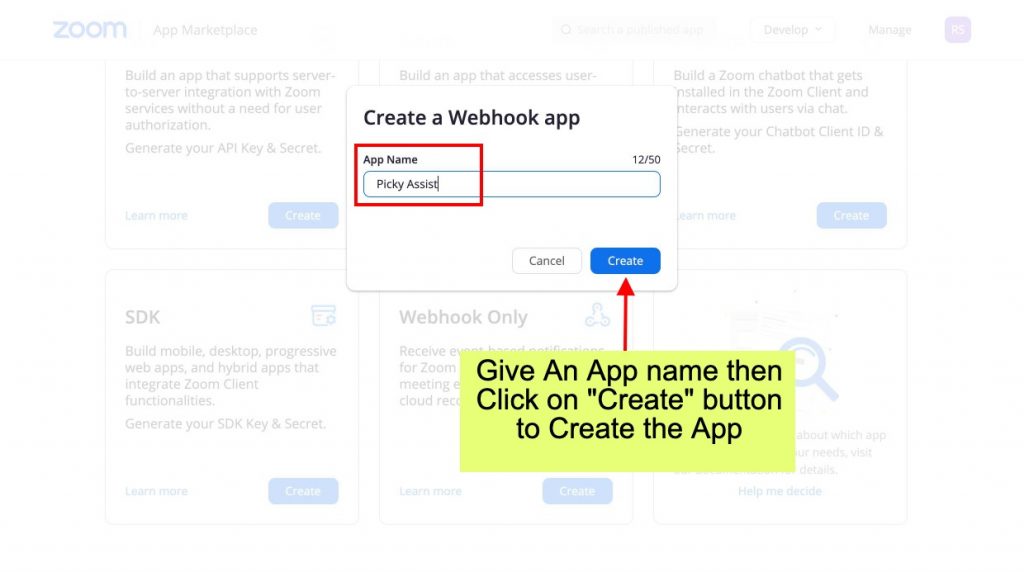
Then you will able to see a window as shown below, select the “Webhook” Only and Click on Create button;
Then give a name to the Webhook App for your reference
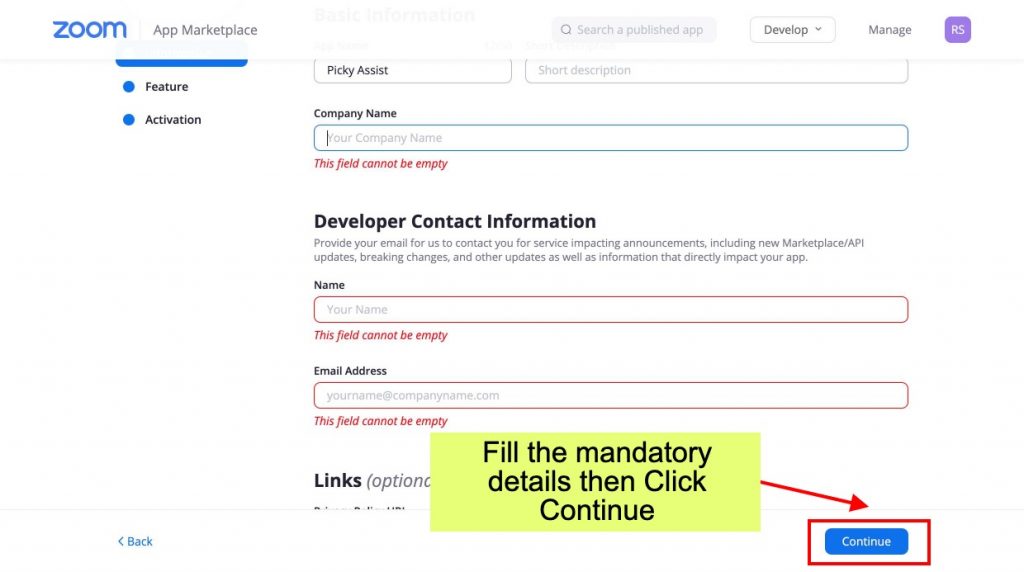
Now you will see a window like below and fill all the details needed;
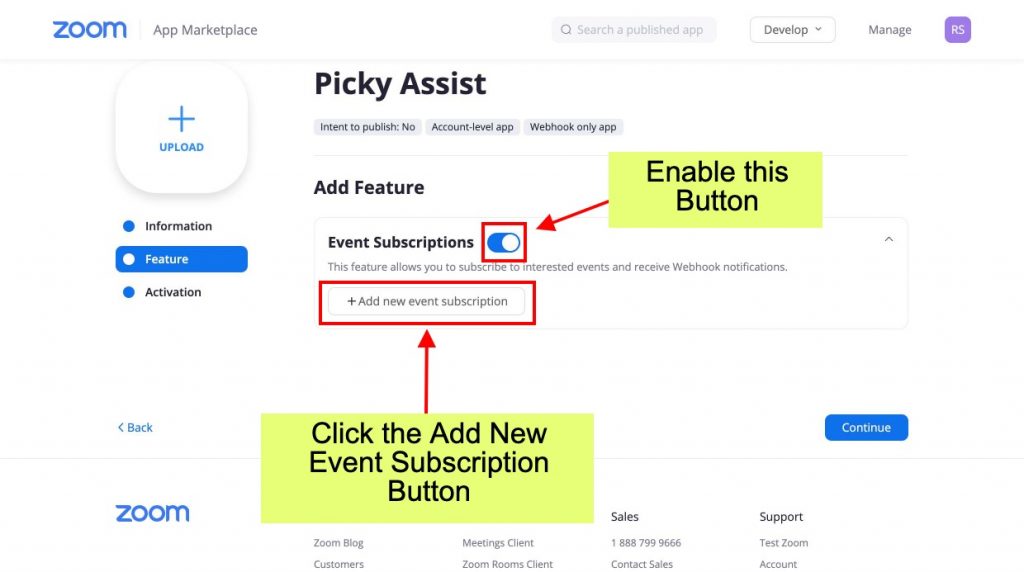
You will see a page as below where you need to enable the Event Subscription and “Add New Event Subscription” to receive events to the Webhook.
Now you can give a name to the event then copy and paste the Webhook URL from Picky Assist to Event Notification Endpoint URL as shown in the below image;

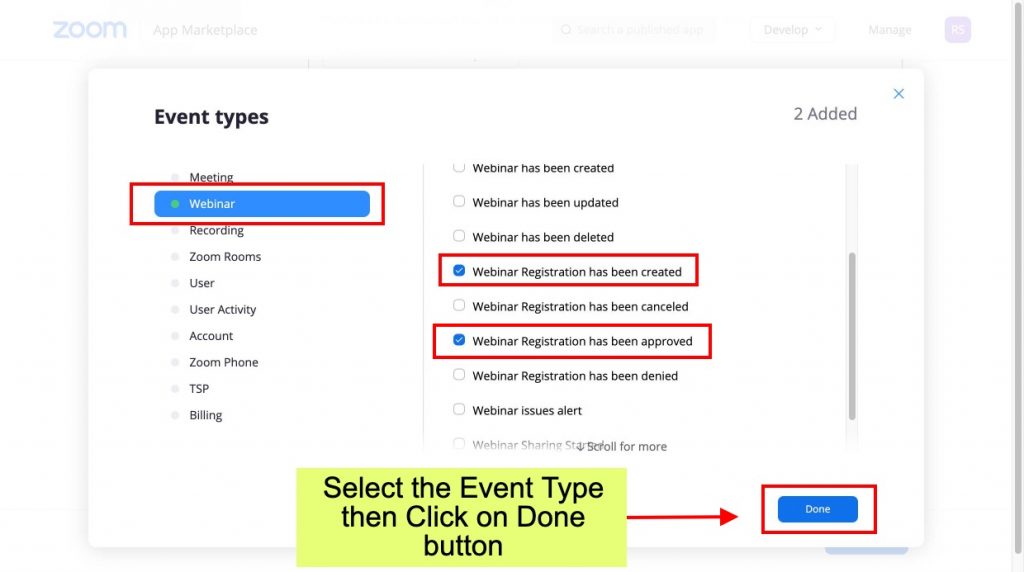
Next we need to “Add Events” so that Zoom Webinar can send those events to Picky Assist Platform, you will see a popup like below and you need to select the “Webinar” menu and select the 2 events as shown below then click on Save button
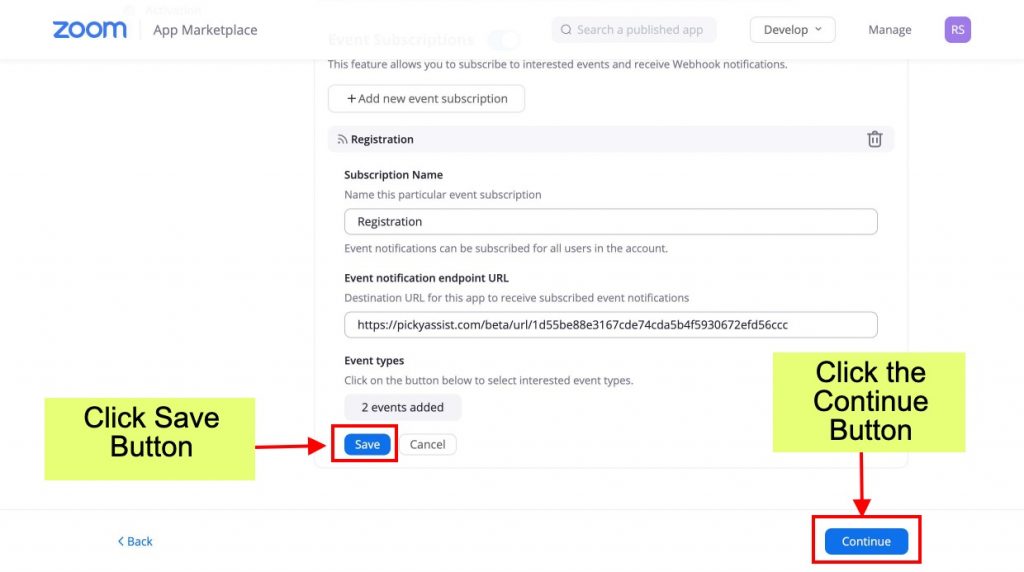
Now you will able to see a window like this and click on Save button then Click on “Continue” as shown below;
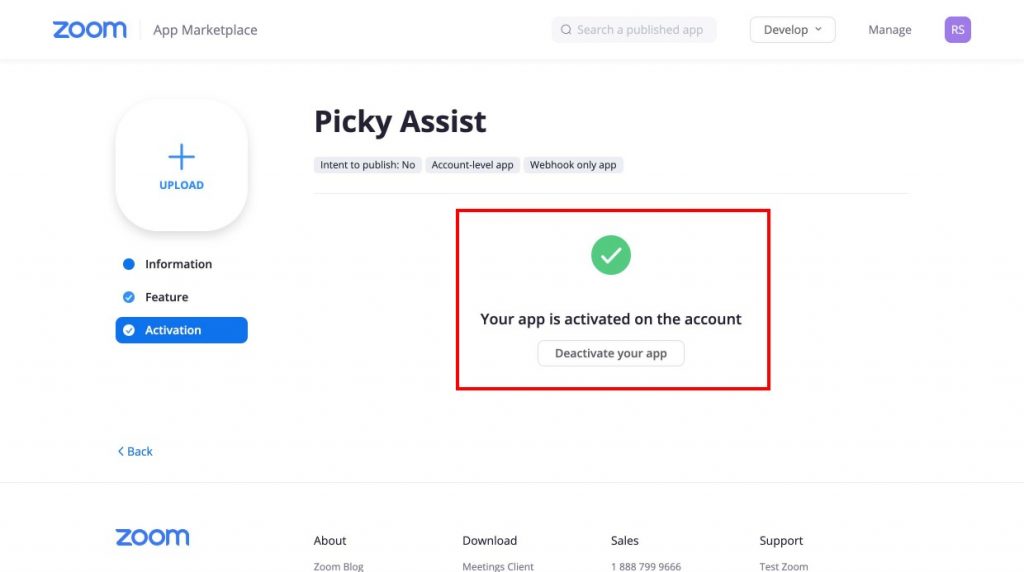
We have now created an App Successfully in the Zoom Webinar Platform
Testing the Connection
In order to test the connection now you need to fill and submit a Webinar Registration form yourself, so that Picky Assist connector will receive the necessary data which can be mapped further to perform automations.
Configuring with Picky Assist Connector
Now we need to open the Picky Assist Connector, to do this kindly login into Picky Assist Account -> Connector, and a popup will open as shown below;
Field Mapping
If you would like to add the Webinar Registration details into the Picky Assist platform as a subscriber for sending a WhatsApp Drip Campaign or send a Mass messages to them in future then you need to make use of “Field Mapping”
If you just want to send a confirmation message and periodic reminders then field mapping is not required
Sending Webinar Confirmation Message
Now let’s learn how to automatically send a Webinar Confirmation Message via WhatsApp when someone register for your Webinar.
We will make use of the Actions here to send the Confirmation Messages
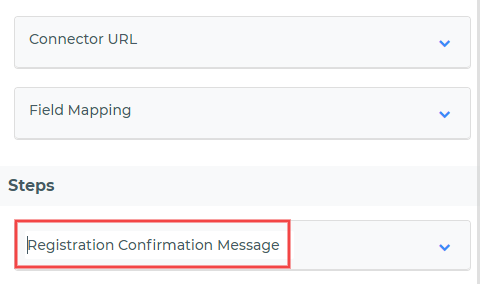
Create A New Step and Give a Relevant Name – Registration Confirmation Message as shown below;
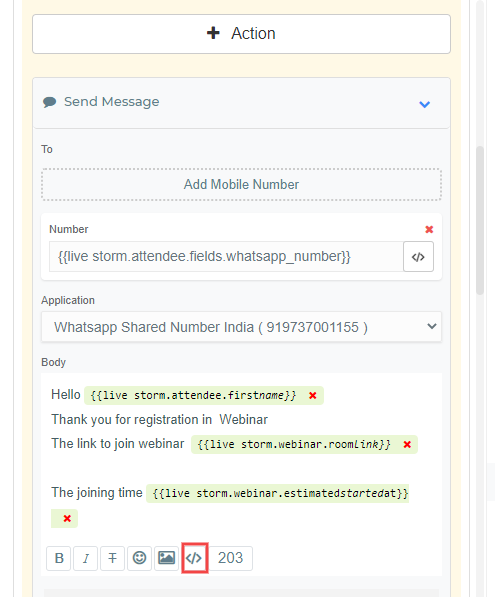
Then inside the Step enable the Action and Add “Send Message” action and select the WhatsApp Number, Channel from the message should go, and enter the message body as shown below;
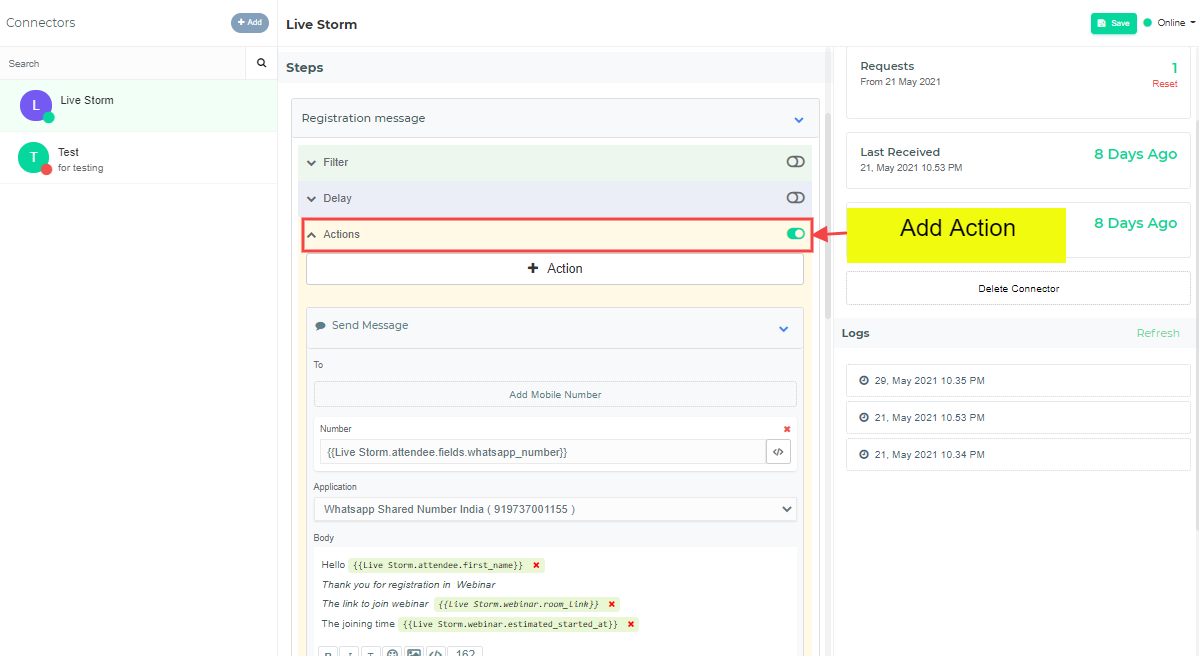
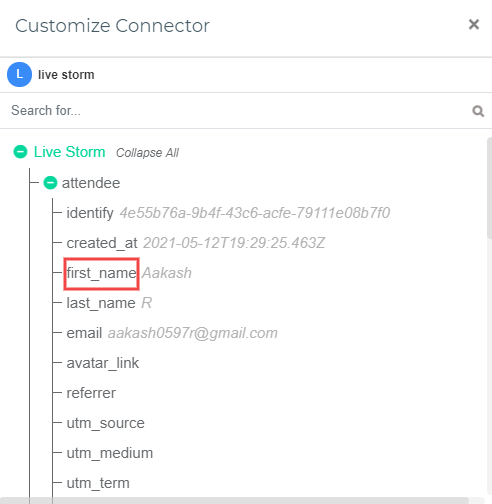
Use the Attribute field to personalise the Messages as shown below
Sending Periodic Reminders
We have created a step in the Connector which sends a Webinar Confirmation message via WhatsApp whenever a new user register for your webinar, now let’s explore how to send periodic reminders to your registrants to minimise the NO SHOW.
Let’s say we want to send the reminder’s as below
- Before 1 Day of the Event
- Before 4 Hours of the Event
- Before 30 minutes of the Event
- On Event Start Time
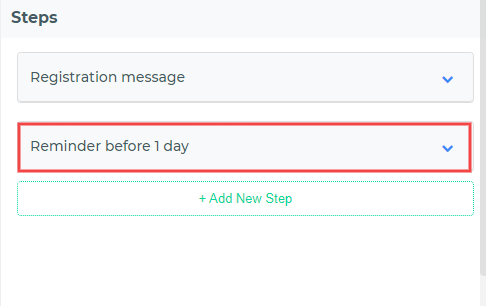
In order to achieve this you need to create 4 more Steps in the Connector and each step will have Delay & Action enabled
Let’s create a new Step and name it “Reminder Before 1 Day” then enable the Delay & Action for the step as shown below;
Setting Up Delay
Now click on Delay and Select “Custom” and select Execute Before 1 Day of ___ Date as shown below;
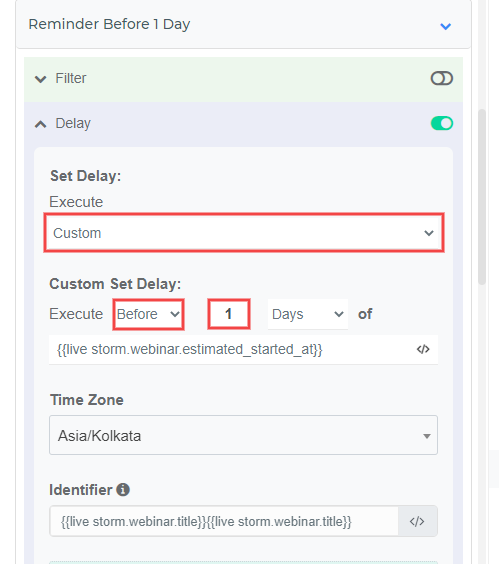
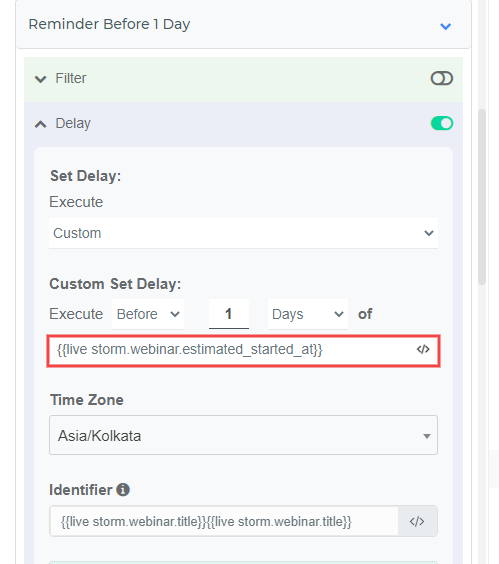
Now you need to select the Webinar Start Date from the event, to do this click on the Attribute Icon and then find the Webinar Start Date & Time and map it as shown below;
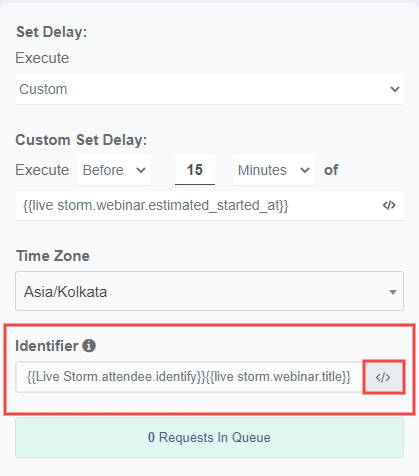
Identifier
The identifier helps you to see how many periodic reminders are pending to be send against each step, in case if a webinar is getting cancelled then identifier helps you to cancel all the periodic reminders configured for that particular webinar, so it’s always advisable to setup up the identifier by giving a unique name.
We recommend to keep the identify name as something like your Webinar Name + Webinar Unique ID this helps you to easily identify which webinar periodic delay should be cancelled.
Setting Up Action to Send the 1st Reminder Message
Now to send the 1st reminder you need to setup the Action -> Send Message and the Select the WhatsApp Number, Channel from the message should go, and enter the message body, same as we did earlier in the Confirmation Sending Step
Now we have successfully setup the 1st Reminder which will send before 1 day of the event start time. Similarly you can setup the remaining 3 reminders, you can make use of Clone Step to ease the process.
Cancelling the Scheduled Reminders
Now let’s see how to cancel all the scheduled reminders in case your webinar got cancelled, here we make use of “Identifier” to find Webinar, in the last step we have given the Identifier name as Webinar Name + Webinar ID so you need to go to the last step in which the delay is configured and click on the button as shown below;
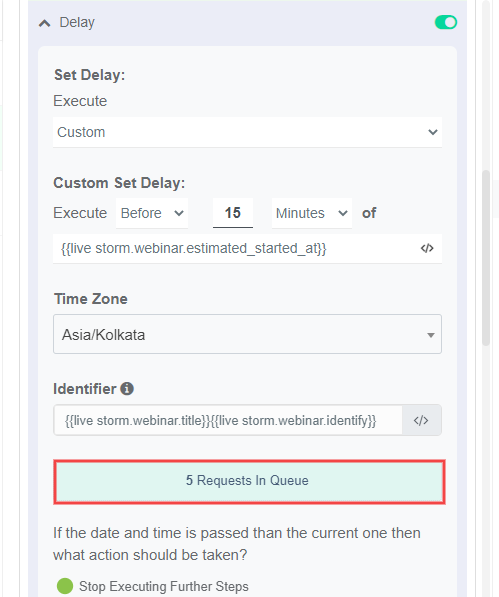
A new popup will appear which will list all the upcoming schedules, now we need to filter the webinar which got cancelled, click on “Identifier” button as shown below;

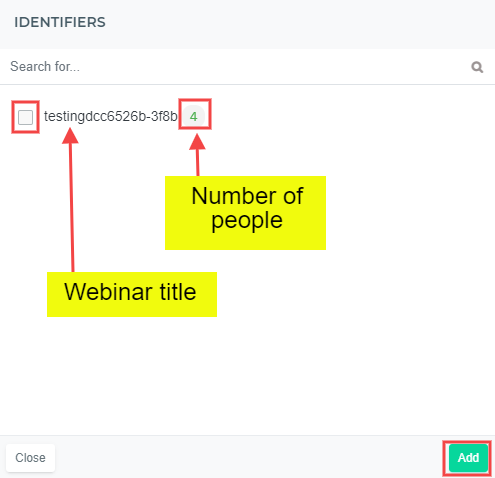
Now this will list all identifiers along with the count of schedules in each identifier, select the identifier you want to cancel and click on “Add” button to filter this out as shown below;
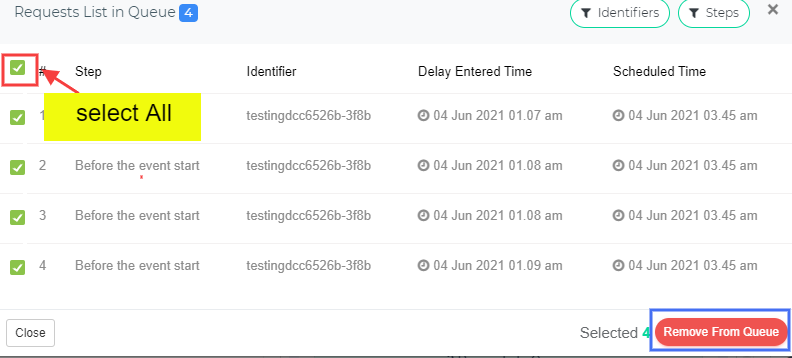
Now this will filter and show all the entries, you can click on Select All then click on “Remove From Queue” button as shown below;
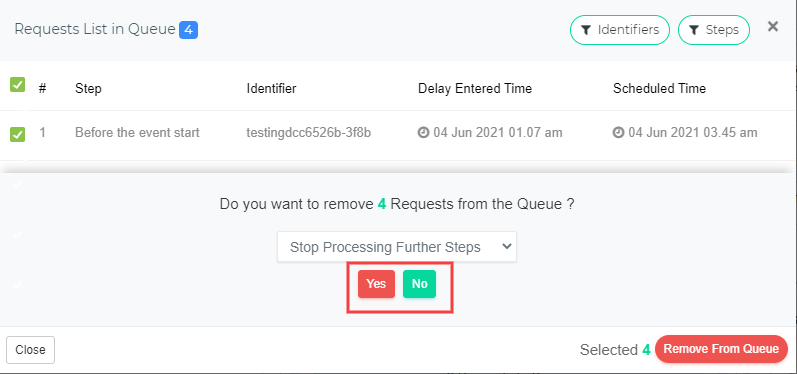
You can then confirm the same and select action as “Stop Processing Further Steps” for these users and click on “Remove From Queue” button as shown below;
Advanced Features
If you want to achieve advanced features like Sending the Message in different language based on customer language preference, sending an automatic followup after 2 days from the Webinar Date, Assigning the webinar registrants as lead in Teambox then make of the Filter and Steps to achieve this.


Add comment