If you have website and blog then you might be familiar with Live chat system, when a live chat widget is added into your website or blog it become more interactive and your visitors are likely to engage 10x more than a website without Live Chat Integration. There are 100’s of live chat platform’s who offer free or paid services, however we are not going to discuss about the traditional live chats platforms here let’s discuss about the facebook chat widget integration into your Website.
What is Facebook Chat Widget and How it Works?
Facebook chat widget helps business to integrate the same messenger capabilities extended to your website or blog i.e how people are messaging to your facebook page they will able to message right from your Website or Blog without visiting your facebook page.
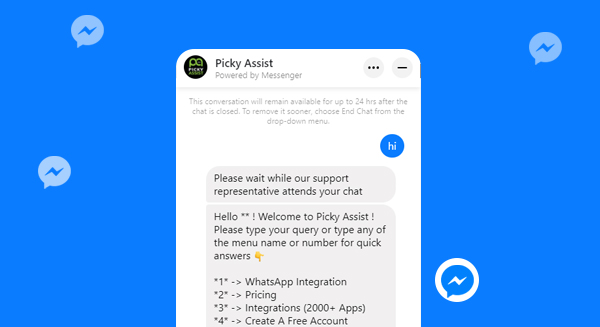
It works similar to any live chat systems so you need to do some basic setup in your facebook page admin platform then copy and paste a code snippet into your website or blog where you want the chat widget to appear. The chat widget will look like as shown below;

What are the advantages of Facebook Chat Widget ?
The noted advantage is that allows you to continue contacting your customers even after they exit from your website which is not possible to achieve using traditional live chat systems i.e when a visitor contacted you through the facebook chat widget from your website even if they closed your website still you can send them a message and continue the conversation.
How to Setup Facebook Chat Widget into your Website?
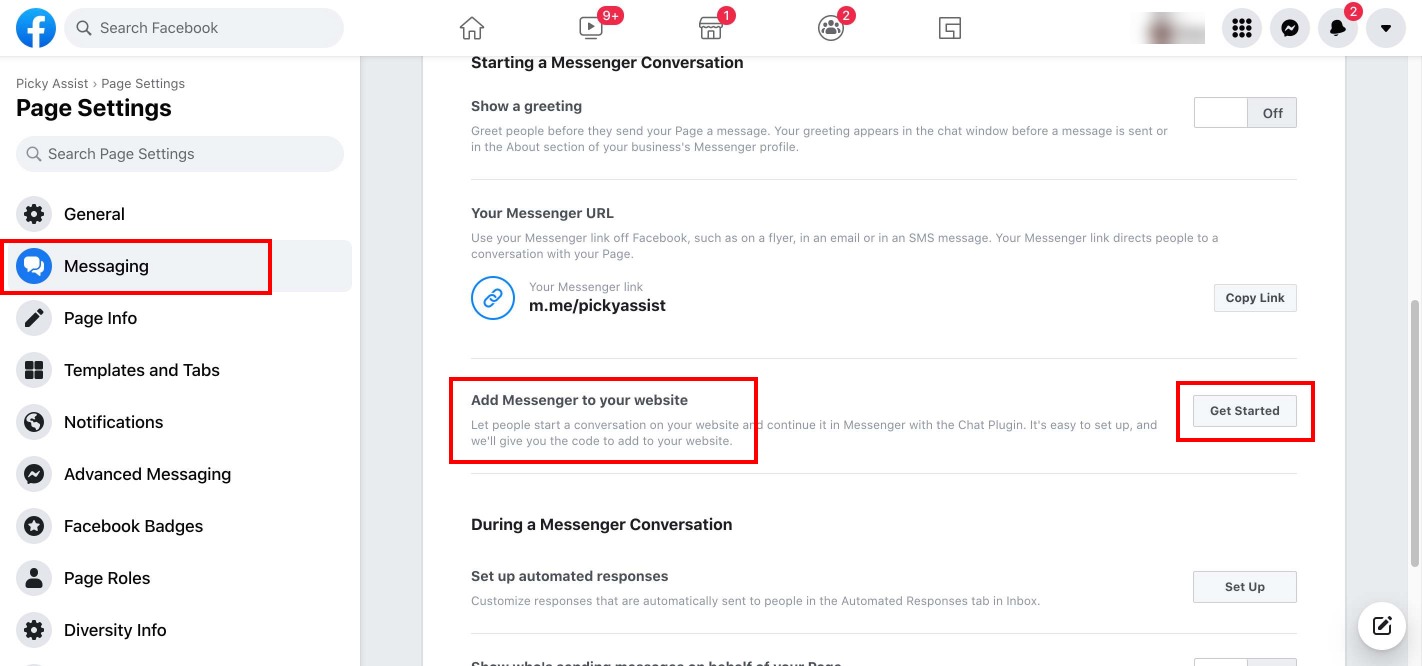
You need to have a facebook page and you should be the admin to start this process, just login into your facebook page then navigate into Settings -> Click on Messaging then click on Get Started button under Add Messenger to your website menu as shown below;
You will then redirected to another page which looks as below where you need to whitelist your website domain after that click on the Setup button as shown below;
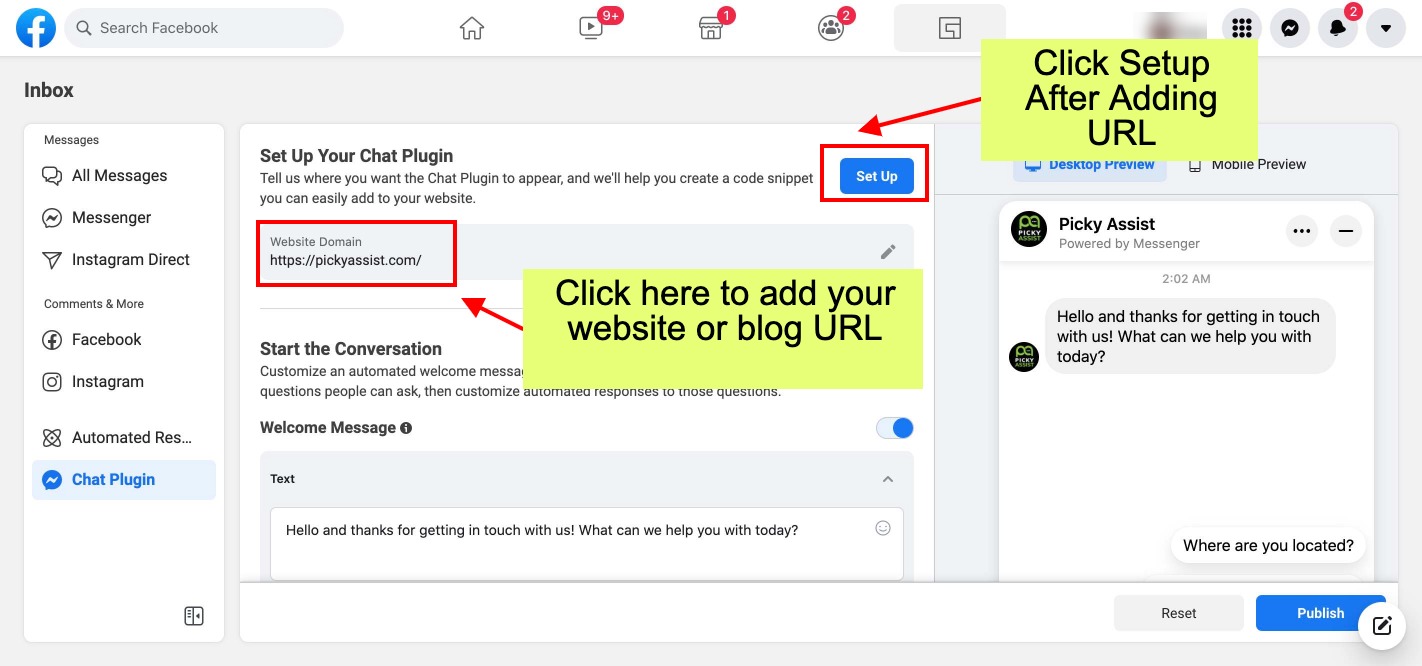
When you click on Setup a popup will open in which you need to Select Language, Add Domains, Copy the Code and then paste this into the header or footer of your website

How to Customise the Facebook Chat Widget Appearance ?
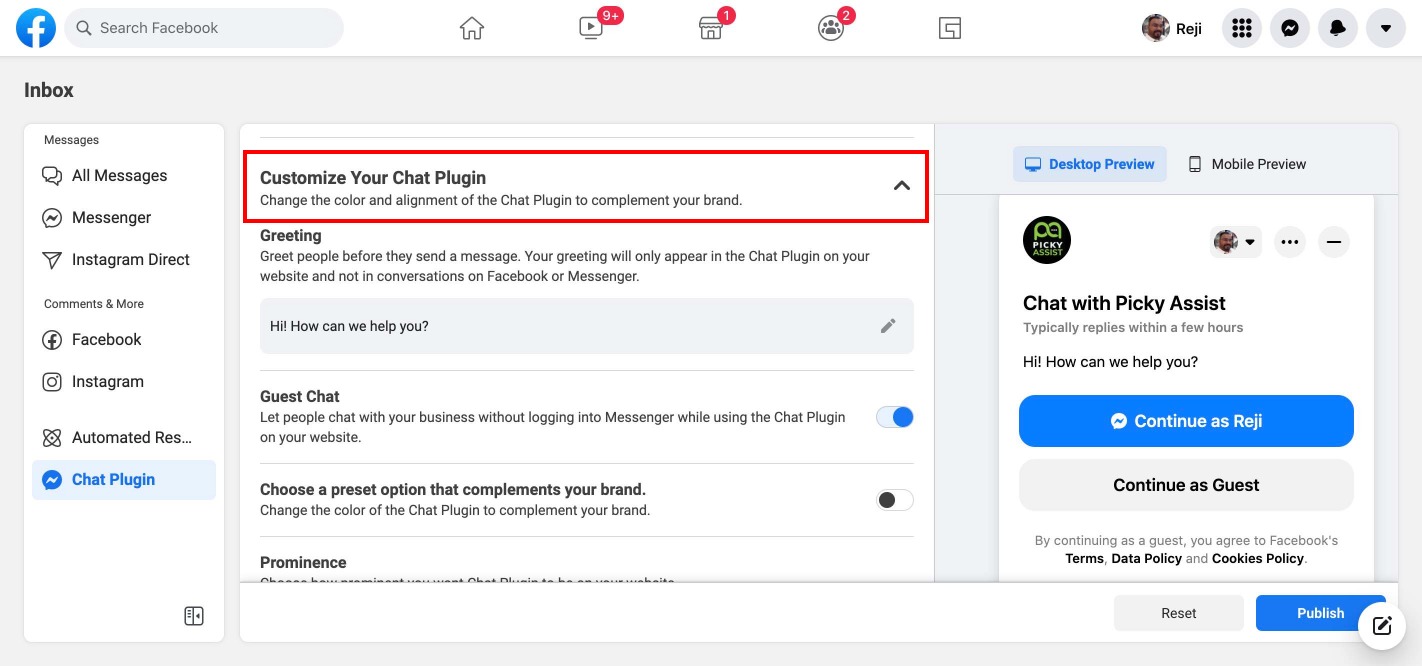
It’s possible to customise the look and feel of the facebook chat widget to make it match to your website theme, you need to click on the Customize Your Chat Plugin section as shown below to see the options
How to Integrate the Facebook Chat Widget Code with Your Website or Blog?
You need to copy and paste a code into your website in order the widget to start appearing in your website, mostly you can add the code into the header or footer of your page.
How to Integrate Facebook Chat Widget into a WordPress Site?
Note: Make sure you’re logged in to Facebook on your browser and that you’re the administrator of your Facebook Page.
- Go to your WordPress homepage and go to WP admin.
- Go to the Plugins menu.
- Click Add New.
- In the search field, type Facebook Chat Plugin.
- Click Search Plugins.
- Select the Facebook Chat Plugin.
- Click Install Now.
- Click Activate.
- You should now see a tab that says Customer Chat. Go to the Getting Started section and click Edit Chat Plugin.
- Customize your Chat Plugin and complete your setup.
How to Integrate Facebook Chat Widget into a Shopify Site?
- Go to the Admin Panel.
- Go to Sales Channels. Under Online Store, click Themes to open the theme page.
- Under the Current Theme section, click Customize.
- You’ll see the preview of your store. Click Theme actions.
- In the pop up menu, click Edit code.
- You’ll see multiple “.liquid” files. Look for the main theme file, usually named theme.liquid. Main theme file content usually starts with
<!doctype html>. - Scroll through the code on the right side and find the line starting with
<body>.For example, it could start with<body class=“template-{{ request.page_type | handle }}">. - On the line below the <body> code, paste the code from the Facebook Chat Plugin Settings.
- Click Save at the top to complete.
How to Integrate Facebook Chat Widget into a Wix Site?
- Click Settings in your admin panel.
- Note: Depending on which page you’re on, you may need to click Site on the top banner of the page before you go to Settings.
- Under the Advanced section, click Custom Code.
- Under the Head section, click Add Code.
- Paste the code in the Paste the code snippet here section and insert an easily identifiable name (like Messenger) under Add Code to Pages.
- Select All pages, then Load code once.
- Under Place Code in, make sure Head is selected, and click Apply.
- Click Publish on the top of the page.
How to Integrate Facebook Chat Widget into a Squarespace Site?
- Click Settings in your admin panel.
- Click Advanced.
- Click Code Injection.
- Paste the code snippet in the Footer section.
- Click Save.
Connecting Facebook Chat Widget with Picky Assist Teambox
You can connect your facebook page now with the Picky Assist Teambox for easy team collaboration and configure advanced chat routing rules, i.e your website visitor and facebook page visitor can chat with your agents who are online in the Picky Assist Teambox. Refer the Setup Guide Here
How to Build Facebook Messenger Chatbots?
You can use Picky Assist Smart Replies to create a Facebook Messenger bot for your business which helps you to answer your customer quires 24 x 7 without any agents, Read More
Add comment