In this guide you will learn how to integrate WhatsApp with ClickFunnels Software using Picky Assist Connector
Pre-Requisite
- WhatsApp Channel Enabled in the Picky Assist Account
- Access to Picky Assist Connector
- ClickFunnels Account
About Click Funnels
ClickFunnels is a sales funnel creator to help businesses automate their sales process from A to Z. It offers you the power to keep each stage of the purchasing journey under control. With ClickFunnels, you can build regular websites, opt-in pages, landing pages, membership websites, squeeze pages, webinars, and so many more. Besides, it allows users to build sales funnels with a large number of pre-made, customizable designs. Read More
Capabilities with ClickFunnels & Picky Assist
When you connect your ClickFunnels account with Picky Assist Connector you can achieve below-mentioned capabilities to enhance the business communication with your customer’s
- Sync Contacts to Picky Assist Platform
- Start a WhatsApp Conversation in the Teambox Instantly when a new contact is created in the Click Funnel
- Assign a Team Member in the Teambox Instantly to engagement with the customer when a new purchase is created or destroyed in the ClickFunnels
- Instantly loop multiple teams using Picky Assist Teambox when a new purchase received in your ClickFunnels Page.
- Start a WhatsApp Drip Campagin whenever a contact is created / updated in ClickFunnels
- Send a WhatsApp Message whenever a new purchase is created
- Do a Broadcaster to send WhatsApp messages in bulk.
Supported Triggers
ClickFunnels supports following triggers and whenever these events occurs you can configure your Connector to take various actions in Picky Assist like Sending a WhatsApp Message, adding or removing a contact from a sequence etc. Read All Supported Actions
- contact_created
- contact_updated
- contact_destroyed
- purchase_created
- purchase_updated
- purchase_destroyed
How It Works?
Picky Assist Connector makes use of the inbuilt ClickFunnels Webhook feature to build the automation. Picky Assist Connector allows you to generate a unique webhook URL which can be configured in the ClickFunnels platform against each funnel, so whenever an event happens in the ClickFunnels software it will trigger the details to the configured Webhook URL, Picky Assist receives the data and process the way you configured it, like sending a WhatsApp Message, Assigning a Team for instant Collaboration etc
Watch Video How You can Configure Webhook in ClickFunnels
Read the Click Funnel Official Web hook Integration Guide
Getting Started – Generating Webhook URL
The first step is to go to Picky Assist and create a Connector URL and get ready with the Connector URL – Read More on How to Create a Connector
Second Step – Configuring Webhook URL
Configure the Webhook URL in the ClickFunnels under Settings -> Webhooks as explained in the above video or see the below steps;
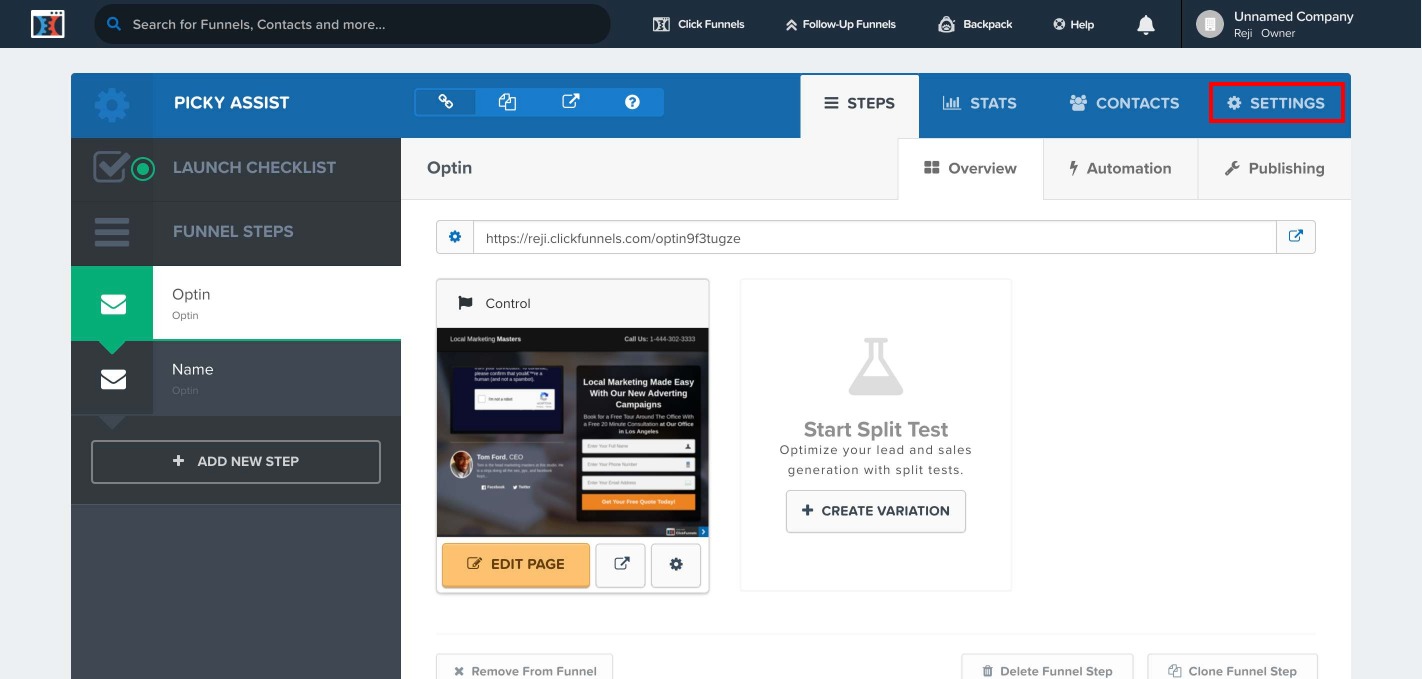
Go to Your Funnel then click on Settings as shown below;
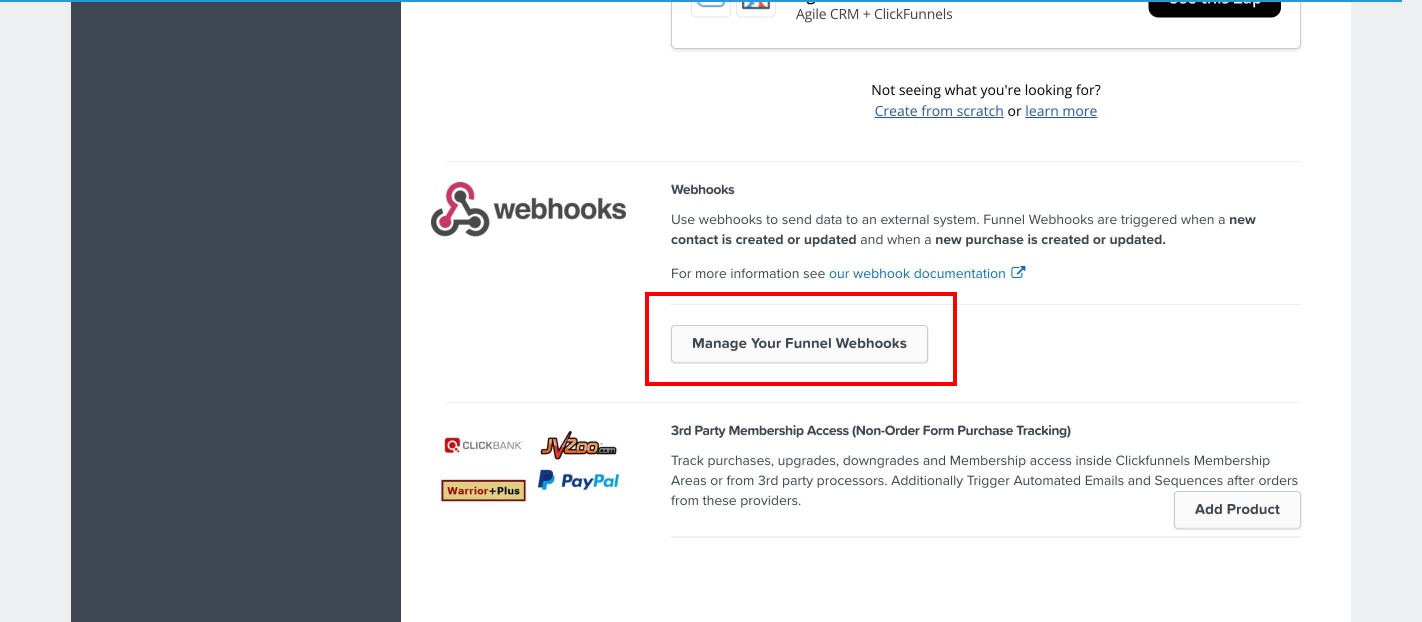
Scroll Down and under Webhook Click on “Manage Your Funnel Webhooks” as shown below;
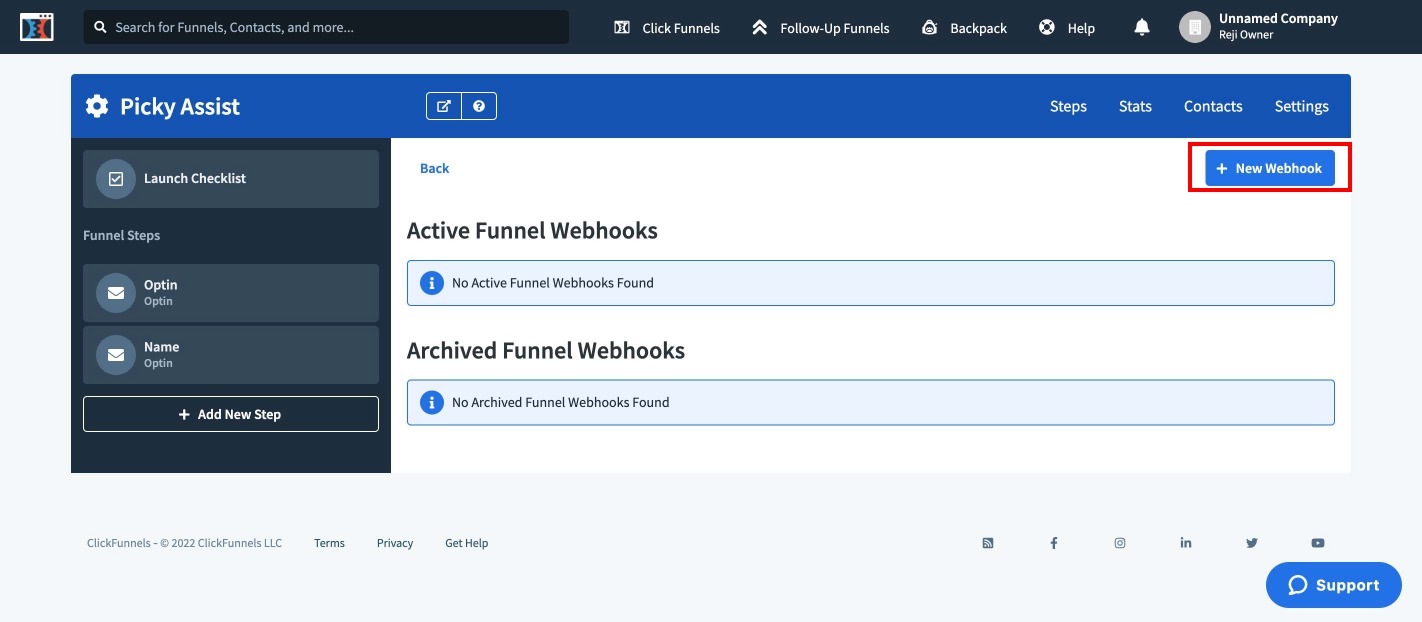
You will see a new page as shown below where you need to click on “Add Webhook” button as shown below;
It will open a form as shown below where you need to configure exactly same as shown in the below image and click on “Create Funnel Webhook” button
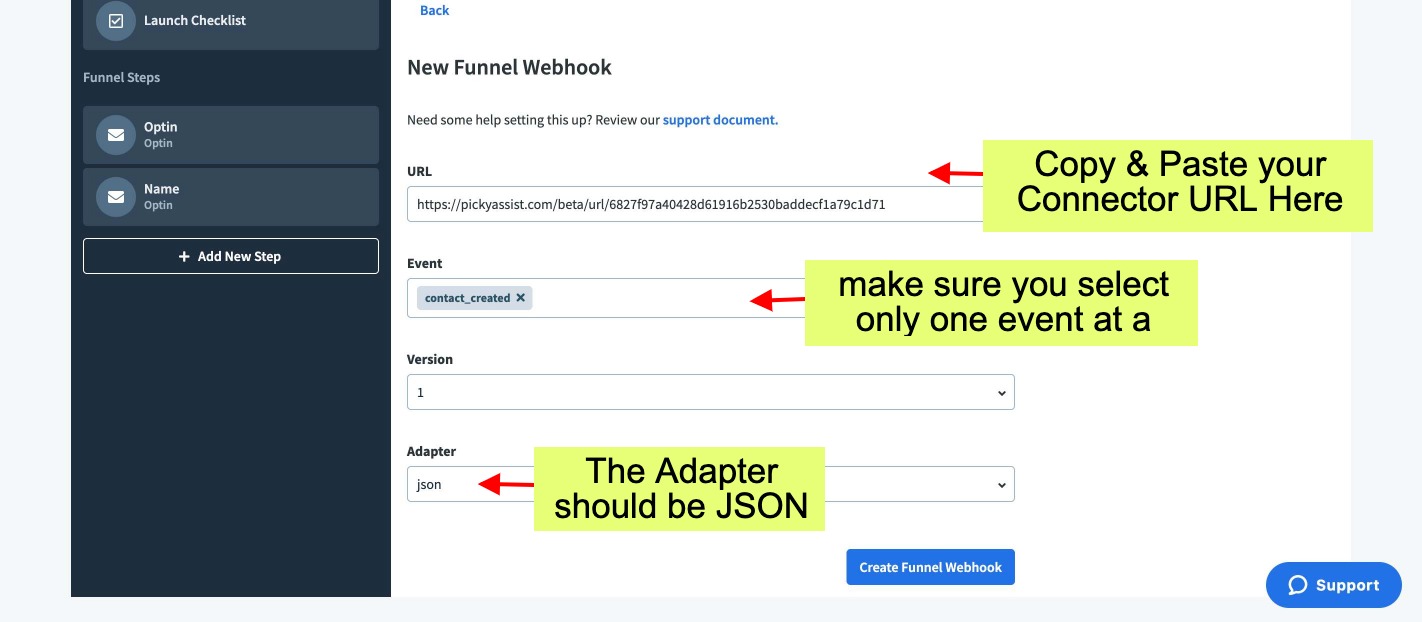
If you are getting any 404 error while adding the webhook then please add the Picky Assist webhook URL without the https i.e start with http:// as shown below;

Third Step – Testing the Integration
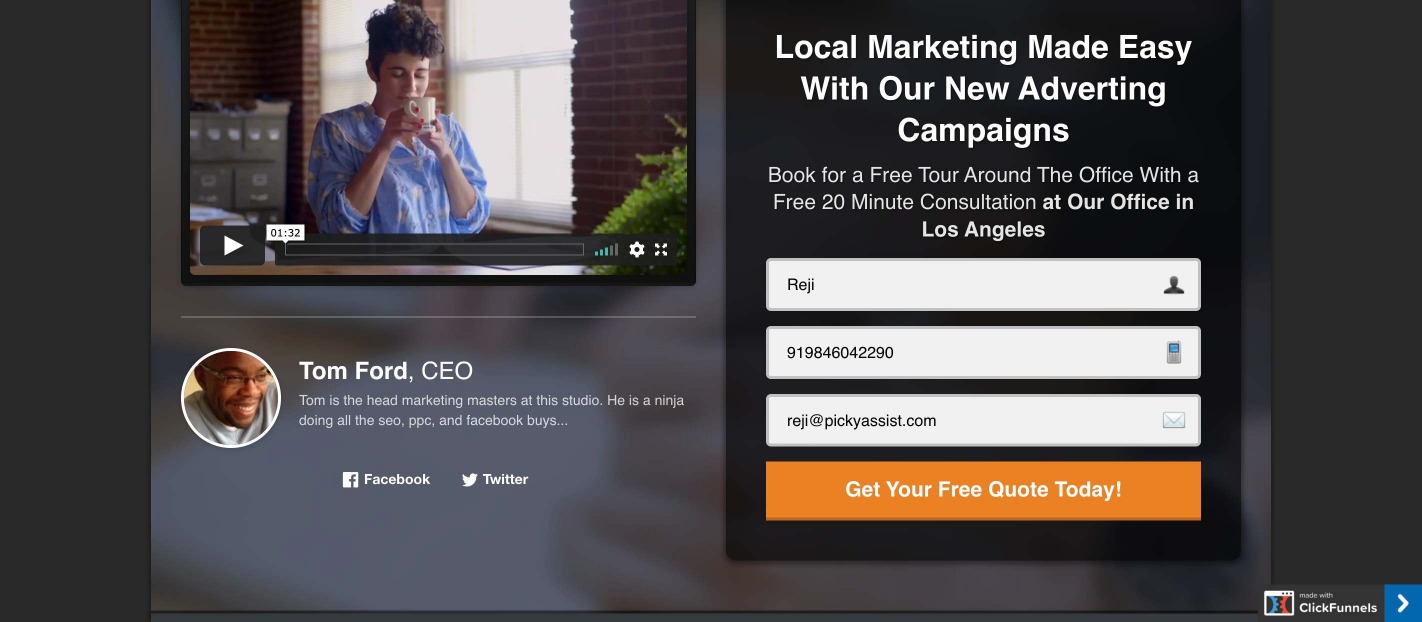
The configuration with ClickFunnels is completed, now you need to perform a test by submitting a contact form in your funnel, please make sure your funnel have a field which capture customer mobile number along with country code as shown below;
Fourth Step – Configuring Actions in Connector
This is the last step in which you need to configure the actions in the Picky Assist Connector i.e what action Picky Assist Connector should take when a new event is received from the ClickFunnels, you can choose the 20+ actions or create conditional actions with filters or even Scheduled Actions with Smart Delay etc
Mapping Fields
You can see all the fields from your ClickFunnels inside the Picky Assist Connector as shown below, you can build advanced automation or actions with Picky Assist family of products.
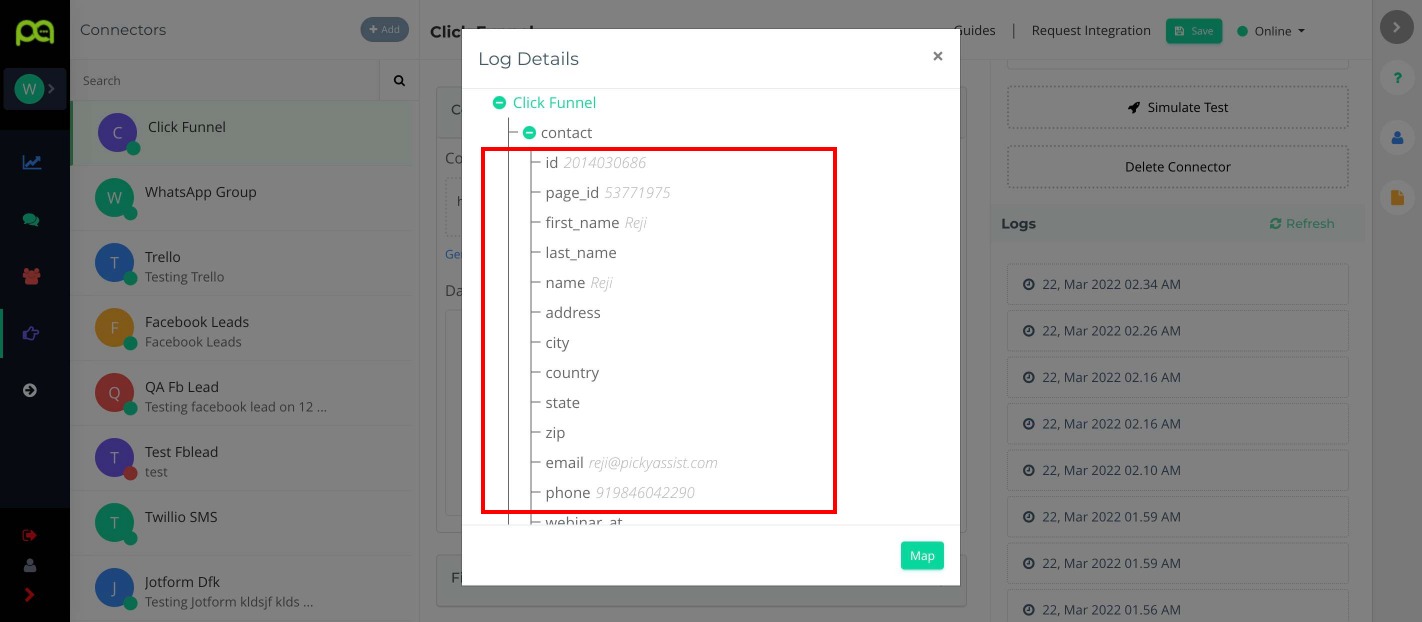
Please note that if you are making any changes in the ClickFunnels Forms then please make sure that you go to the Picky Assist Connector and Remap the Structure then only new fields created in your Click Funnel Form gets mapped with Picky Assist.
Add comment