Let’s learn how WhatsApp Integration into Webflow works for continuing conversation even if your website visitor left your website
Pre-Requisite for WhatsApp Integration into Webflow
- WhatsApp Channel Enabled in the Picky Assist Account
- Access to Picky Assist Connector
- Webflow Account
What is Webflow?
Webflow is an advanced Content Management Software (CMS) similar to WordPress which allows you to build websites, blog and e-commerce store without any coding. Read More
Capabilities with Webflow & Picky Assist
When you connect your Webflow account with Picky Assist Connector you can achieve below-mentioned capabilities to enhance the business communication with your customer’s
- Sync Contact Form Data to Picky Assist Platform
- Start a WhatsApp conversation in the Teambox instantly when a user submits a new contact form on your website.
- Assign a Team Member in the Teambox Instantly to engagement with the customer when a new order is received
- Instantly loop multiple teams using Picky Assist Teambox when a new purchase received in your Webflow Page.
- Start a WhatsApp Drip Campagin whenever a form is submitted in Webflow
- Send a WhatsApp Message whenever a new order is created
- Create Broadcaster to send WhatsApp messages in bulk.
Supported Triggers
Webflow supports following triggers and whenever these events occurs you can configure your Connector to take various actions in Picky Assist like Sending a WhatsApp Message, adding or removing a contact from a sequence etc.
- New Contact Form Submission
- New Order Received
- Order Changed
- Site is Published
- Ecommerce Inventory Change
How It Works?
Picky Assist Connector makes use of the inbuilt Webflow Webhook feature to build the automation. Picky Assist Connector generates a unique webhook URL that you can configure in Webflow. When an event occurs in Webflow, it sends the data to this webhook URL. Picky Assist then receives the data and processes it based on your configuration, such as sending a WhatsApp message or assigning a team for instant collaboration.
Getting Started – Generating Webhook URL
The first step is to go to Picky Assist and create a Connector URL and get ready with the Connector URL – Read More on How to Create a Connector
Configuring Webhook URL
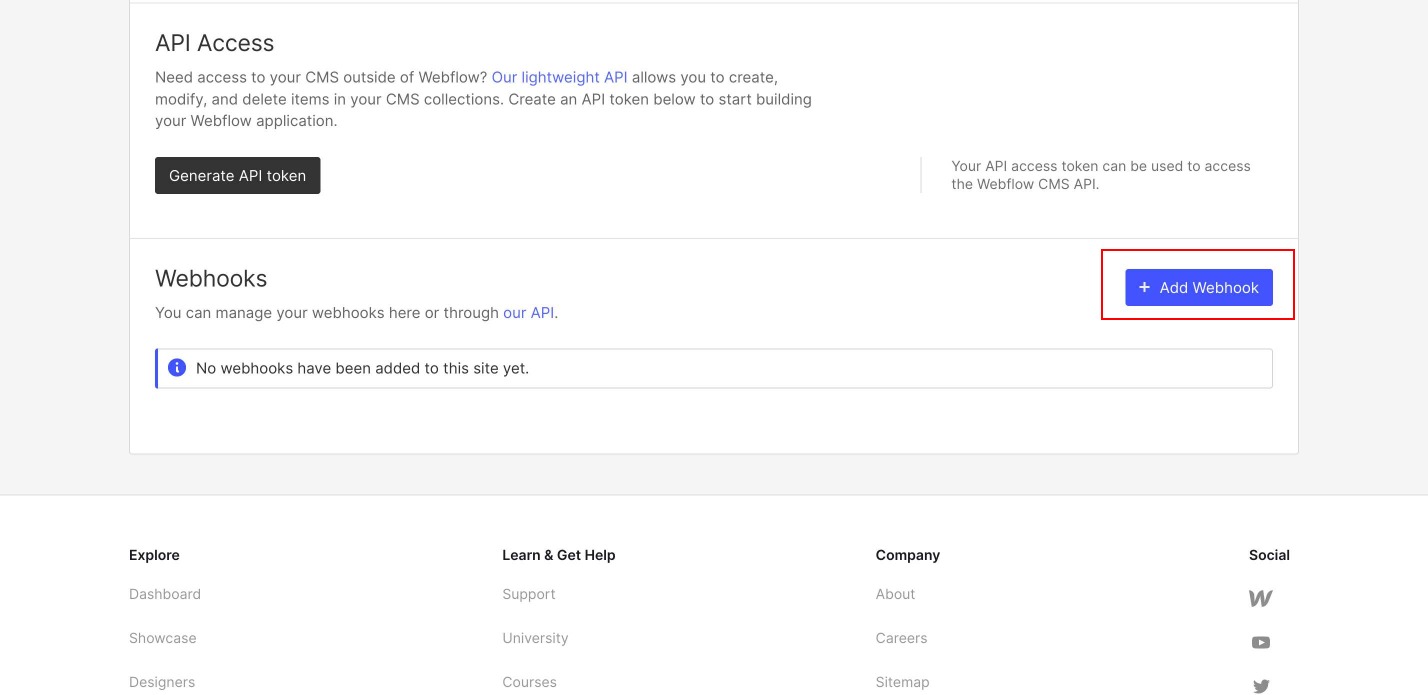
Configure the Webhook URL in the Webflow under Project Settings -> Integrations -> Webhooks and click on “Add new Webhook” as shown below;
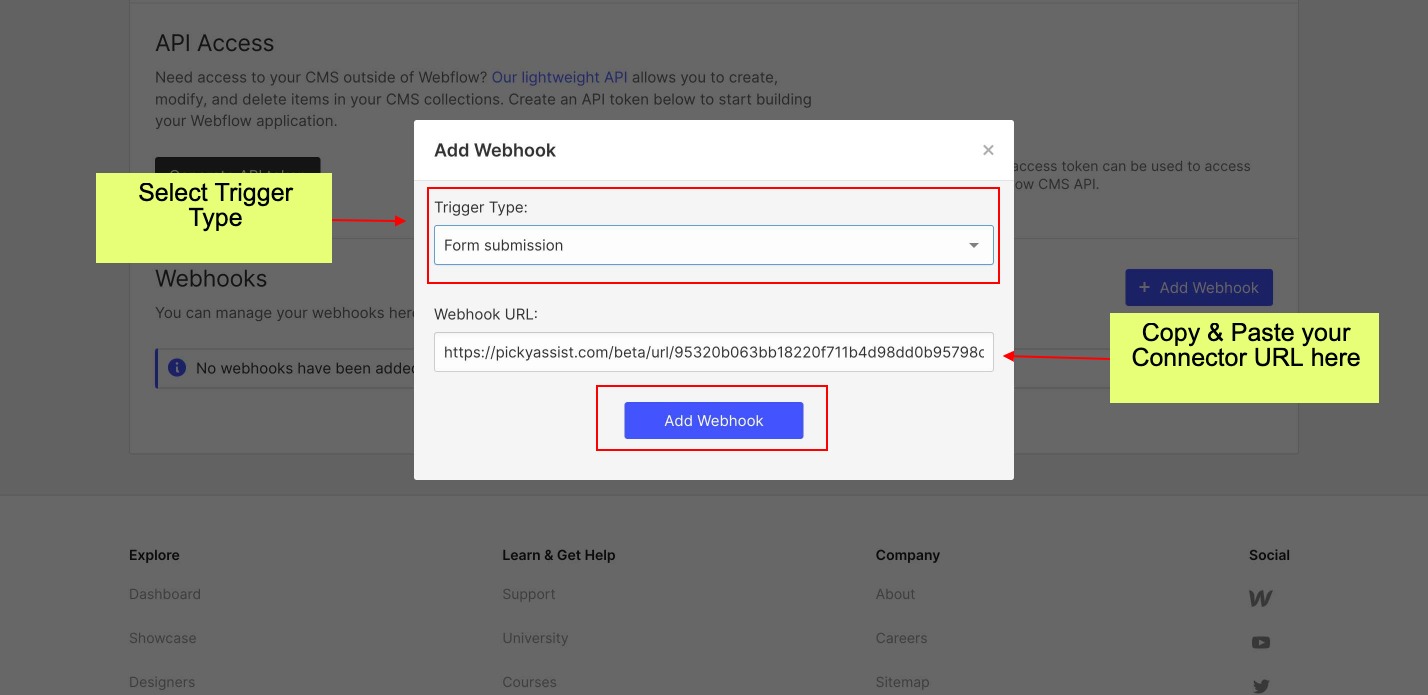
On clicking “Add Webhook” a popup will appear where you need to choose the event then put the Webhook URL which you have created in your Picky Assist Connector as show below;
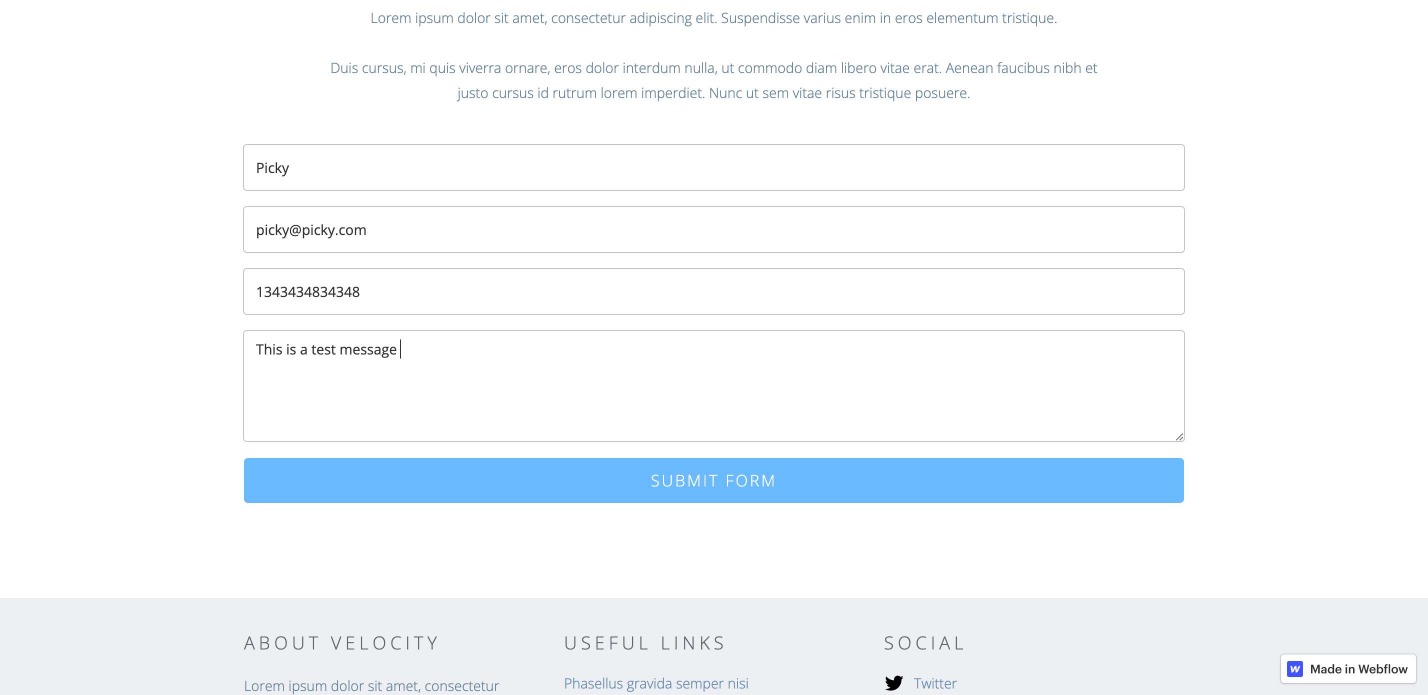
Testing the Integration
Based on the trigger type you select, create an event such as placing an order or submitting a form. This allows the Picky Assist Connector to receive structured data, which you can use to trigger actions like sending a WhatsApp message or adding a contact to a drip campaign.
Configuring Actions in Connector
In this final step, you configure the actions in the Picky Assist Connector. Define what actions it should take when it receives a new event from Webflow. You can choose from 20+ actions, create conditional actions with filters, or set up scheduled actions using Smart Delay.
Mapping Fields
You can see all the fields from your Webflow inside the Picky Assist Connector as shown below, you can build advanced automation or actions with Picky Assist family of products.
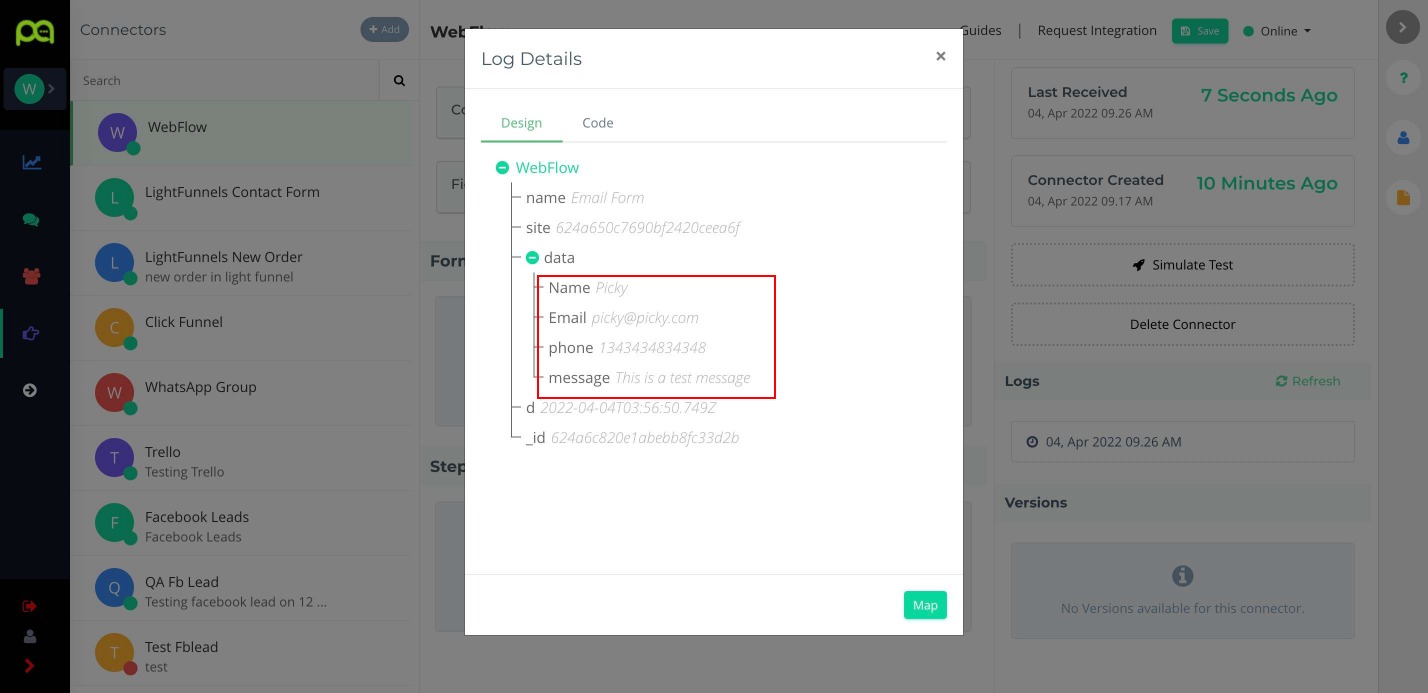
Please make sure that the Form & Checkout page always ask for Mobile Number with Country Code for the Picky Assist to send WhatsApp messages


Add comment