
In this article we will explain how WhatsApp can be integrated into Jotform using Picky Assist Connector
Pre-Requisite
- WhatsApp Channel Enabled Picky Assist Account
- Access to Picky Assist Connector
- Jotform Account
About Jotform
Jotform is an advanced interactive online form builder used more more than 10 million users worldwide and offers free plan with limited features and flexible paid plan with advanced features.
Capabilities with Picky Assist Connector
When you connect your Jotform with Picky Assist Connector you can achieve below-mentioned capabilities to enhance your communication with your customer’s
- Send A Thank you WhatsApp message to the User who fills the form
- Inform your Sales Team via WhatsApp / Email about new form submission
- Create an Advanced Filter and Send WhatsApp Message based on the Filter Condition.
- Add the Jot Form entries as PIcky Assist Contact
- Add Tags & Categories for user segmentation and later using the Broadcaster feature.
- Add User into a Sequence (WhatsApp Drip Campaign)
- Assign a Chat to a Team Member / Department using Teambox
How It Works?
Picky Assist Connector makes use of the Jotform Webhook & API to listen the real-time event alerts i.e whenever a new form is submitted in the Jotform platform we receive an event with all details and further you will able to perform different automations as configured in the Picky Assist Connector.
Getting Started
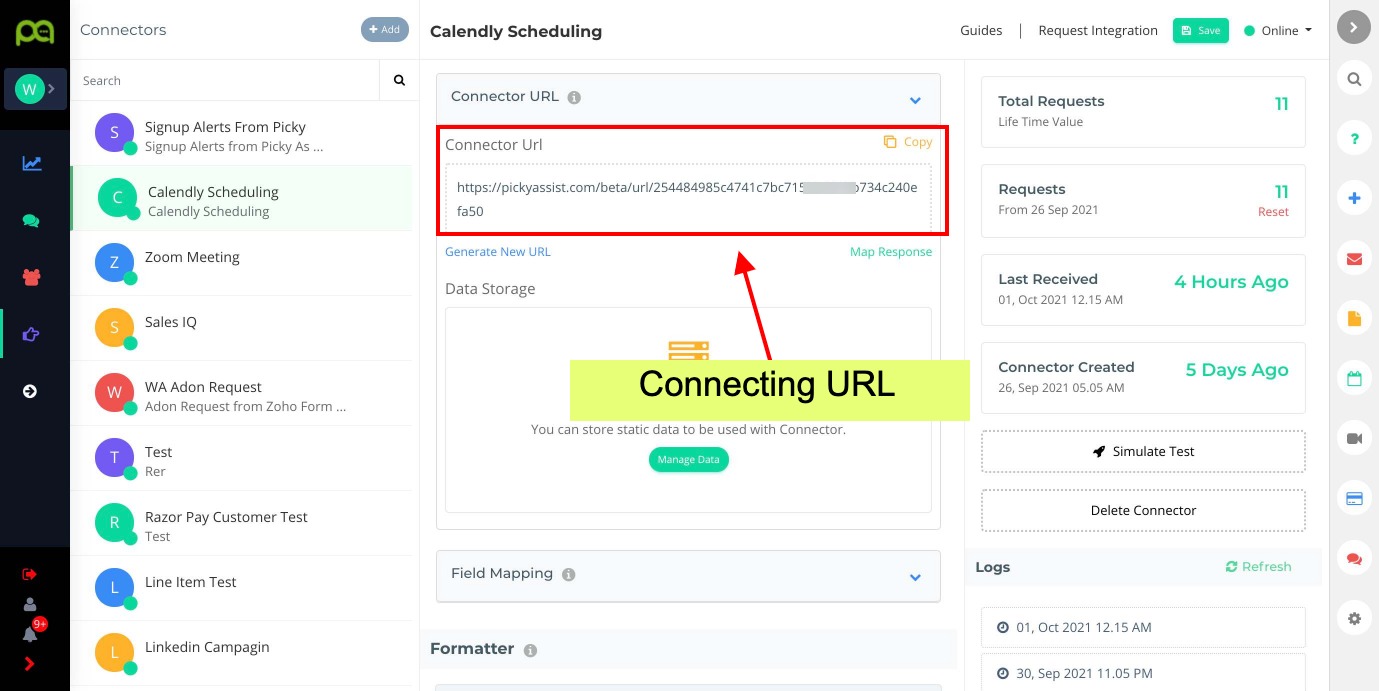
The first step is to go to Picky Assist and create a Connector URL, just make sure the Connector is in Online Mode to start accepting requests from Jotform
Integration with Jotform
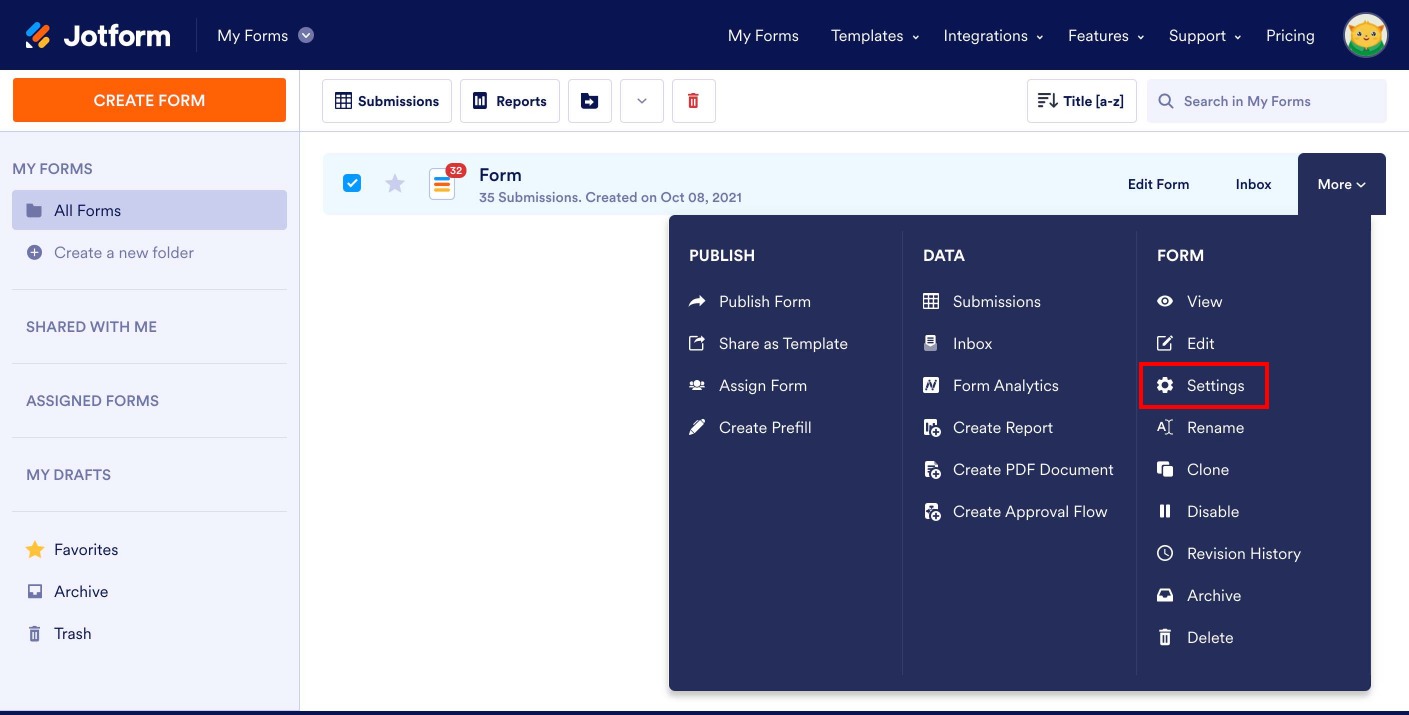
The integration with Jotform will be done through the Webhook, so first select the form you would like to integrate with Picky Assist then Click on More and Select Settings menu as shown below;
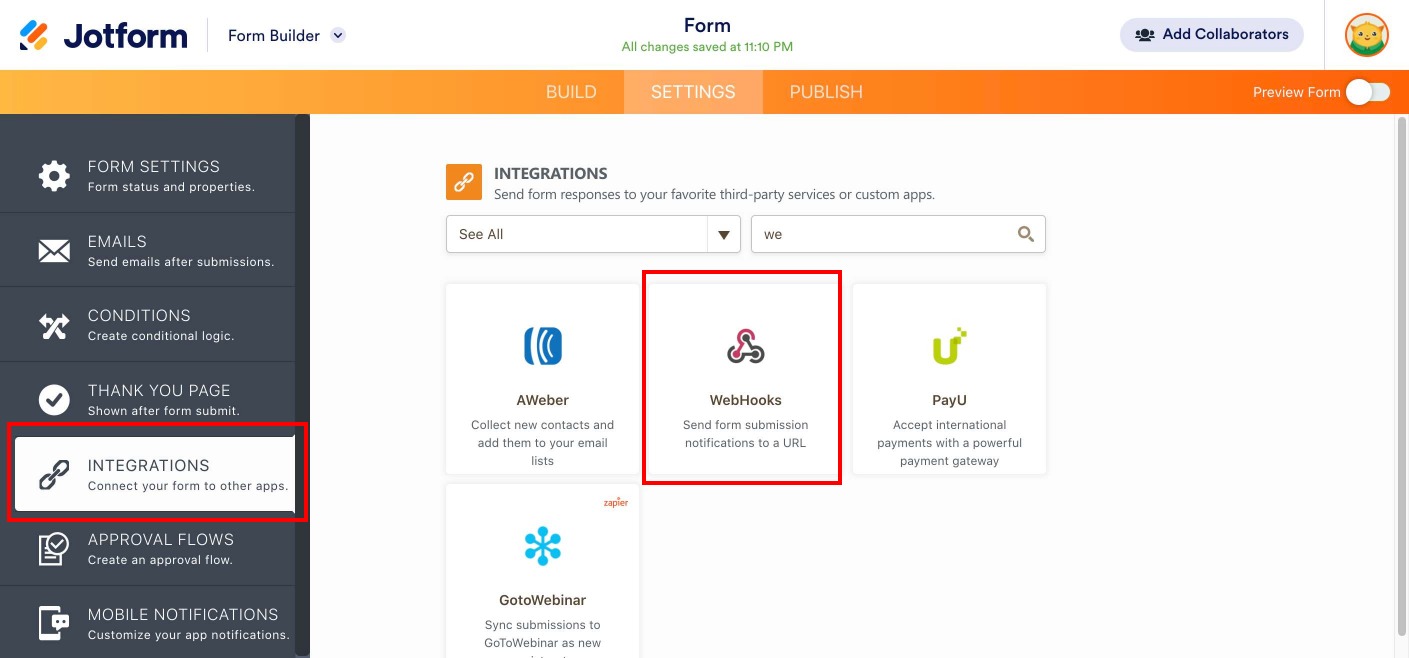
A new page will appear and click on “Integrations” from the left side menu and then Select the “Webhook” as shown below;
After Clicking the “Webhook” you need to copy and paste the Connecting URL from Picky Assist as shown below;

Testing the Integration
After completing the above step now you need to submit a sample form so that the Picky Assist Connector receives the required data for field mapping
So publish your form and fill the form and submit the data, kindly fill all the fields even if it’s not mandatory for your forms this helps to get the complete form structure in the Picky Assist.
Field Mapping
Once you submitted the form you need to go back to the Picky Assist Connector select the Connector you created for Jotform then go to Field Mapping to map the form data with Picky Assist platform
This is an optional settings and if configured it will help you to start a WhatsApp Drip Campagin, Assign an Agent in the Teambox for Instant Followup, Tag the form submission which can be used for sending targeting WhatsApp messages through Broadcaster later. Read More
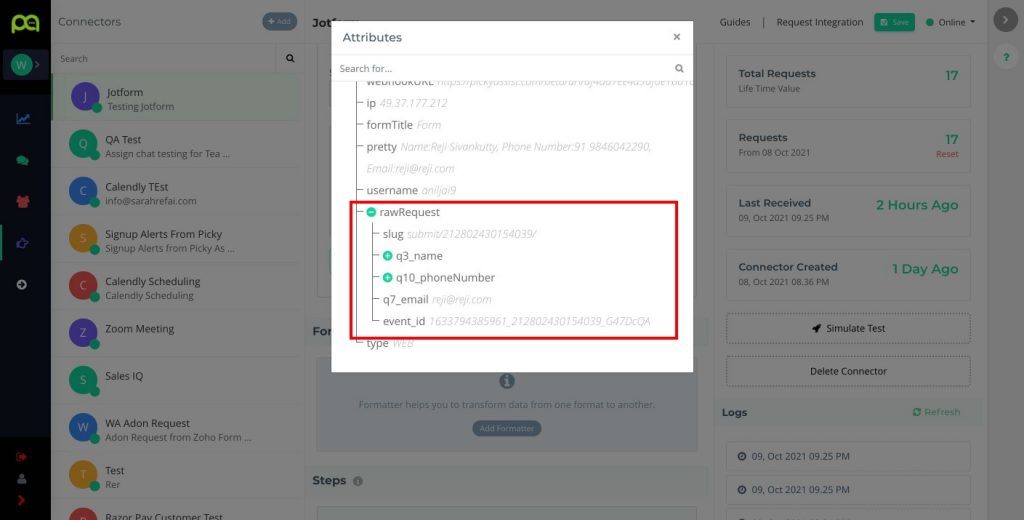
You can find the Jotform Response with the variable name “rawRequest” you can expand each question and answer to map this with Picky Assist Contact Fields

Please note Mobile Number or Email Address is mandatory for Field Mapping, Mobile Number should be with country code to work, if you are getting Area Code and Mobile Number in separate field then you can combine both the field together in the Mobile filed for mapping
Setting Up Actions
Actions helps you to take an action when a form is submitted you can add many actions like Send A WhatsApp Message, Add Tag, Add the User into Sequence etc as per your requirements Read More
Creating Filters
Filters are useful if you wish to check certain conditions in the form and then perform the actions based on the condition for example if you offer 3 services and when the user selects Service 1 you want to alert a sales rep who handles the Service 1 and move the user into the specific category. Read More
Important Notes
- After the initial setup if you are editing the form then please make sure that you update the latest Form Structure in the JSON Code under field mapping To do this after making the changes in the form, fill and submit a sample entry then go to the Picky Assist and from the right side logs click on the last log received time and from the popup copy the Request Body Code and paste into the JSON Code section then click on Map to update the Structure. Read More
- Always make sure you are adjusting the filter conditions and attribute values if the form field names are getting an update.
- Always ask users to fill in the mobile number along with the country code to avoid failed messages.


Add comment