We will learn how to Integrate WhatsApp with Calendly to send automatic WhatsApp Messages to the Invitee & Guest whenever a new meeting is scheduled.
Pre-Requisite
- WhatsApp Channel Enabled Picky Assist Account
- Access to Picky Assist Connector
- Calendly Paid Account
About Calendly
Calendly is the #1 Meeting Scheduling Platform in the world which helps to book appointments and meetings effortlessly.
Capabilities with Picky Assist Connector
When you connect your Calendly account with Picky Assist Connector you can achieve the below-mentioned capabilities to enhance your communication with your customer’s
- Send Meeting URL and Information through WhatsApp.
- Send Periodic Meeting Reminders through WhatsApp
- Sending Followup through WhatsApp
- Assign Chat to a Teambox Users when a meeting is scheduled
- Team Collaboration through Teambox after the meeting.
How It Works?
Picky Assist Connector makes use of the Calendly Webhook to listen to the real-time event alerts i.e whenever a new meeting is scheduled in the Calendly platform we receive an event with all details and further you will be able to perform different automations as configured in the Picky Assist Connector.
Getting Started
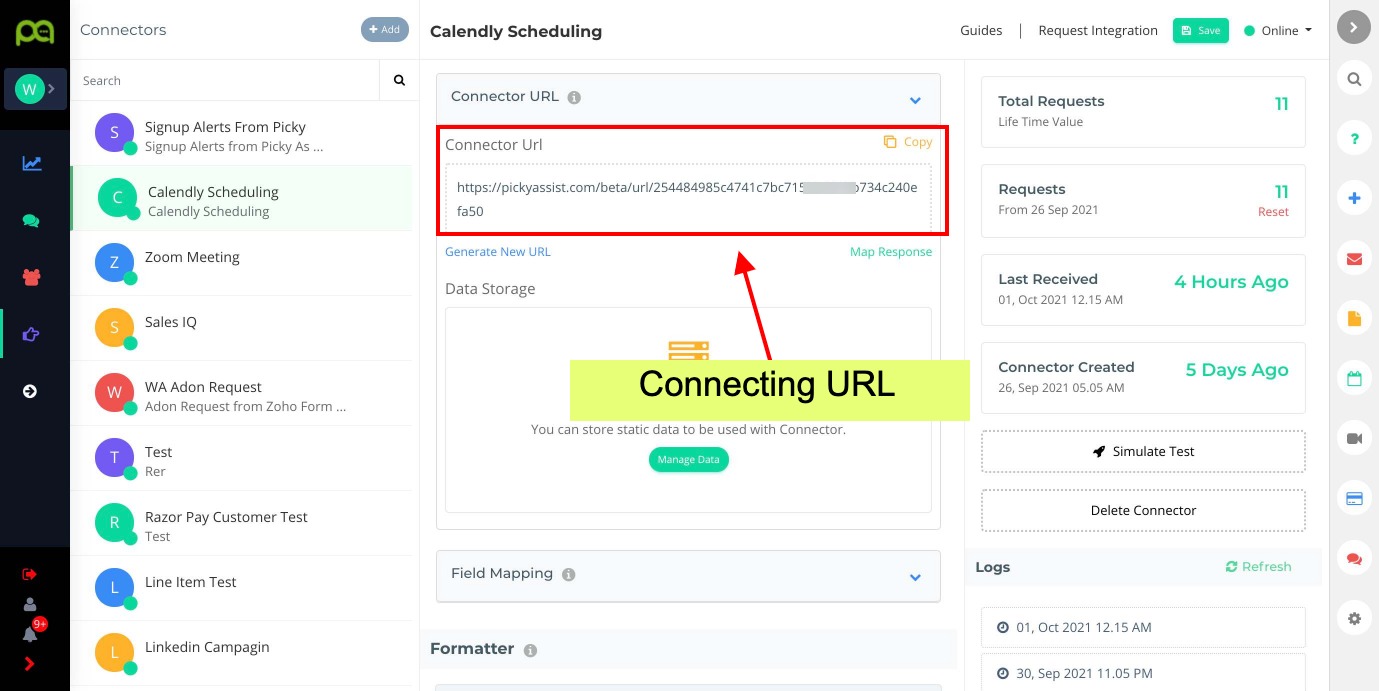
The first step is to go to Picky Assist and create a Connector URL, just make sure the Connector is in Online Mode to start accepting requests from Calendly
Getting the Calendly API Token
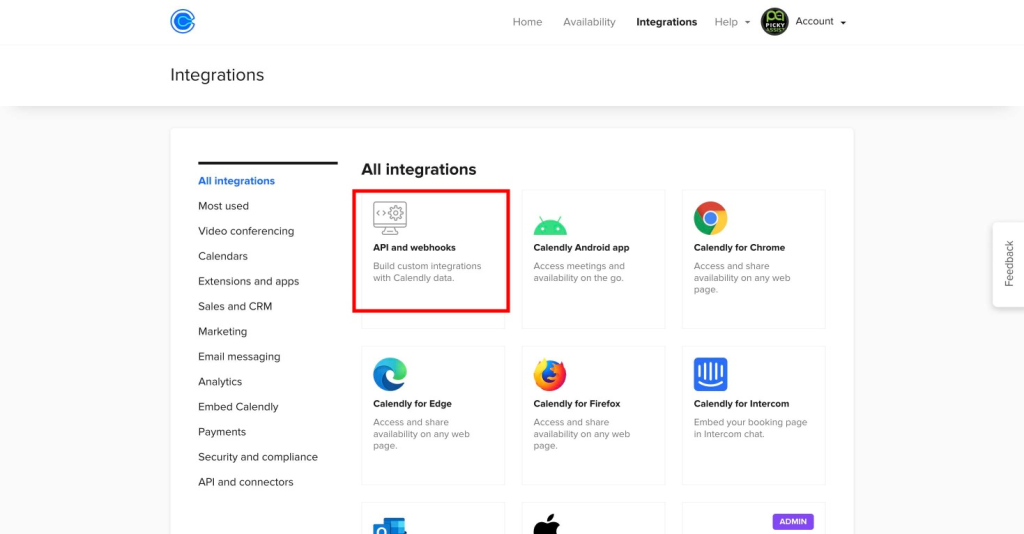
After creating the Connector URL you need to login into the Calendly account then navigate to Integrations https://calendly.com/integrations/api_webhooks then need to create a new Personal Access Token as shown below;
Step 1 Click on “API and Webhooks”
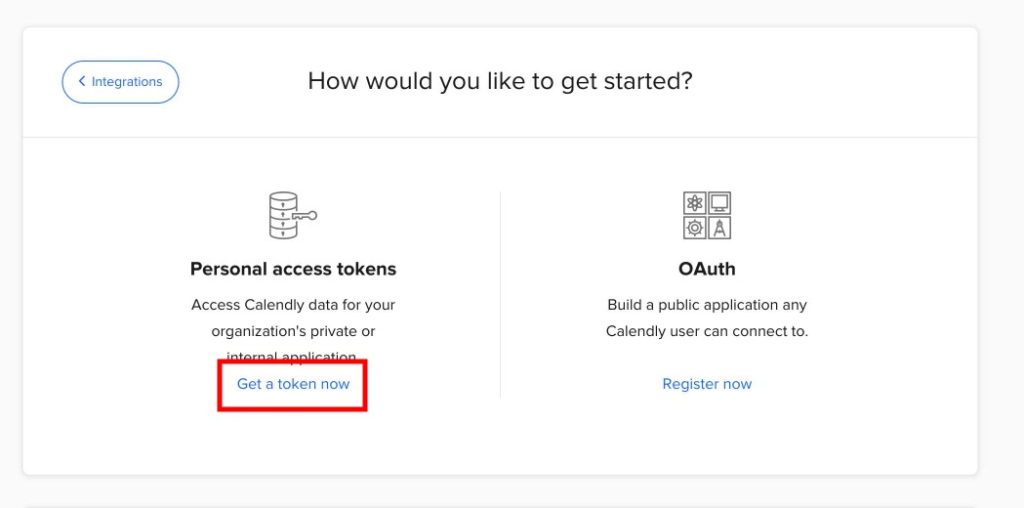
Step 2 Click “Get a token now” as shown below
Step 3 – Give a Name for your Token & Click on the “Create Token” button
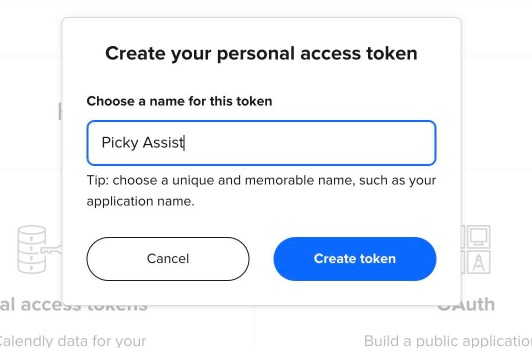
Step 4 – Copy the Token to a Notepad

Registering Webhook URL in Calendly
The next step is to register the Webhook URL in your Calendly Account, you need the Connector URL & API token of Calendly to complete this step
Step 1 – Open the URL https://pickyassist.com/app/api/tools/calendly.php & fill in the required details
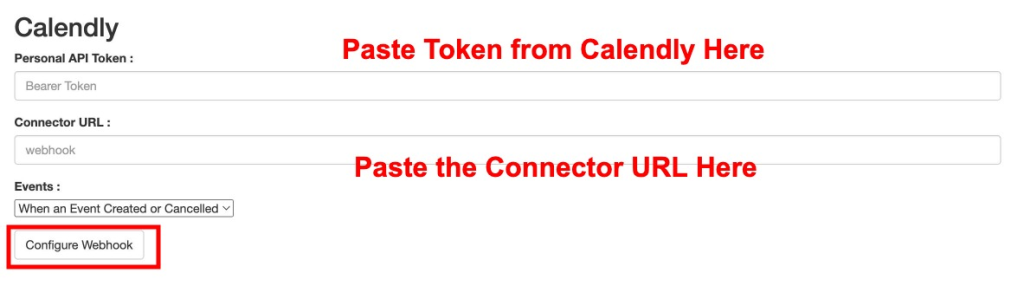
Events: You can see 3 options based on your requirements you need to select the event
When Event Created or Cancelled: If you select this then you will get events whenever a new event is created and cancelled you need to configure a filter in your Picky Assist Connector to work perfectly
When Event is Created: This will trigger only when the event is created
When Event is Cancelled: This will trigger only if the event is cancelled
If the webhook is successfully generated in the Calendly system you will get a “Sucess” message as shown below
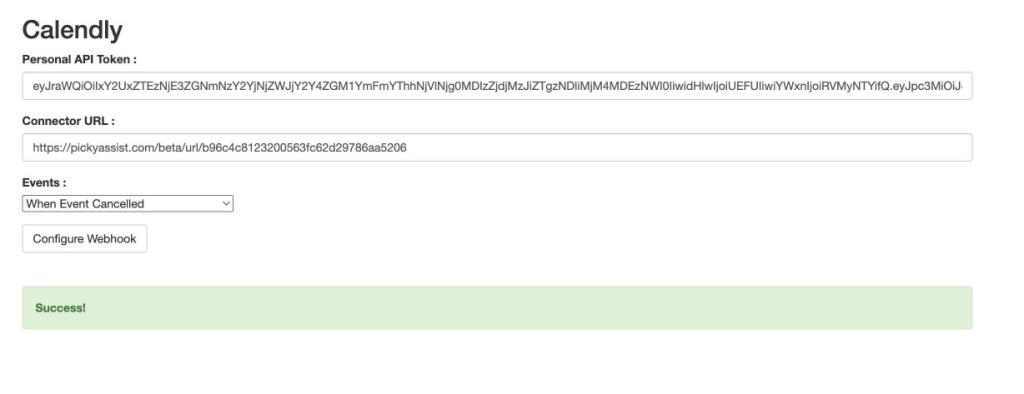
Kindly keep the API Token safe as we need this in further steps
Testing the Connection
Now you have to create an event through Calendly booking URL so that Picky Assist Connector receives your Custom Form Structure which allows you to automate the Events.
Configuring with Picky Assist Connector
Now we need to open the Picky Assist Connector, to do this kindly login into Picky Assist Account -> Connector, and a popup will open as shown below;
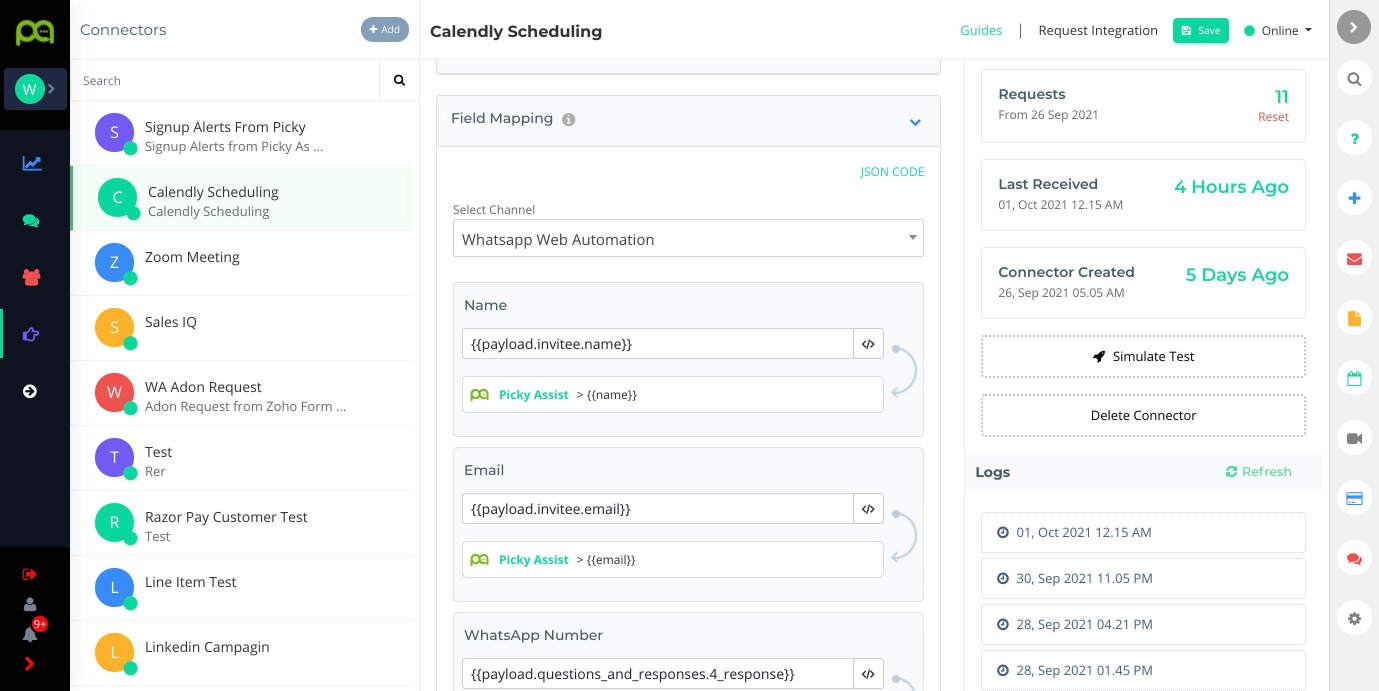
Field Mapping
If you would like to add the Meeting Registration details to the Picky Assist platform as a Contact for sending a WhatsApp Drip Campaign or send Mass messages in future then you need to make use of “Field Mapping”
If you just want to send a confirmation message and periodic reminders then field mapping is not required
If your calendly account has more than one booking page and if you have custom questions for each booking page then you must make use of “Filter” and “Route to Another Connector” features in the Picky Assist Connector to work with events from all booking pages perfectly.
Getting the Event & Location Details
In the above step, we have configured to receive event into the Picky Assist Connector whenever a new event is created/canceled now we need to get the event details like starting time, meeting link (Zoom, Google, etc) related to the meeting
For this, we have to make use of the “HTTP Request” action in the Picky Assist Connector, so create a Step in the Connector and click move to Actions enable action then search for “HTTP Request” click on “Configure” button to start configuring the API
Before doing this step kindly save the Calendly API Token into the Picky Assist “Data Storage” so that you can easily re-use it wherever needed
- Give a Name to HTTP Request like “Calendly Event Fetch”
- Then select the method as “GET”
- In “URL” we need to copy and paste the event URL which is given by the Calendly in the first webhook, we need to copy and paste this once to get the response mapped, you can go to Logs of the Connector and get the URL which is under “payload -> event” looks like https://api.calendly.com/scheduled_events/38cb0aed-e537-4575-96a1-f1ab0e0343
- Click on the “Test” button and the response will get mapped into the Picky Assist HTTP Module, now you need to replace this URL dynamically as below;
- In “URL” select the attribute then choose the payload of the Connector -> under “payload” select “event” variable
- After that go to the “Authorisation” tab then from the “Authorisation Type” drop-down select “Bearer Token” select the attribute and “Data Storage” select the field in which you have saved the API Token from Calendly
- Now “Save HTTP” to complete this step
Sending Confirmation Message
Now let’s learn how to automatically send a Confirmation Message via WhatsApp when someone books an appointment.
We will make use of the Actions here to send the Booking Confirmation Message along with Meeting URL
Create A New Step and Give a Relevant Name – Appointment Confirmation Message as shown below;
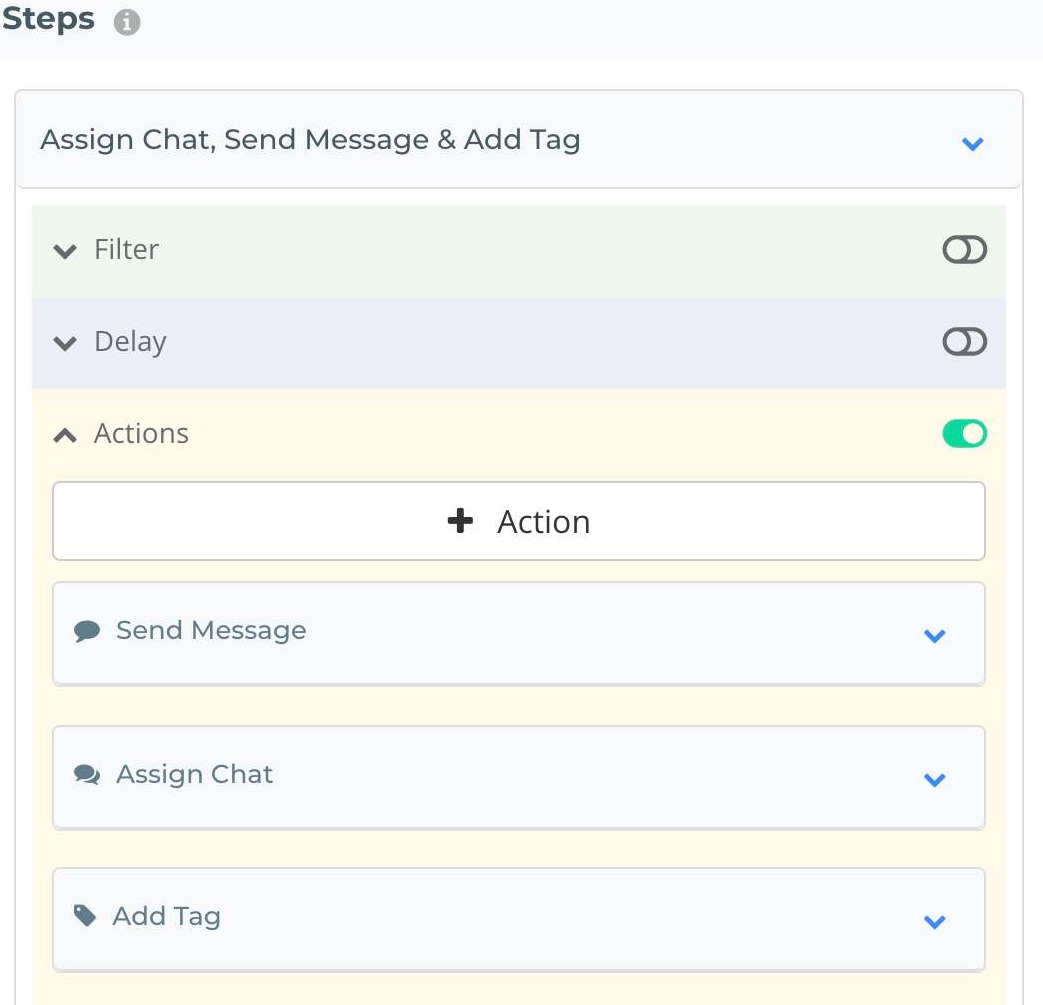
Then inside the Step enable the Action and Add “Send Message” action and select the WhatsApp Number, Channel from the message should go, and enter the message body as shown below;
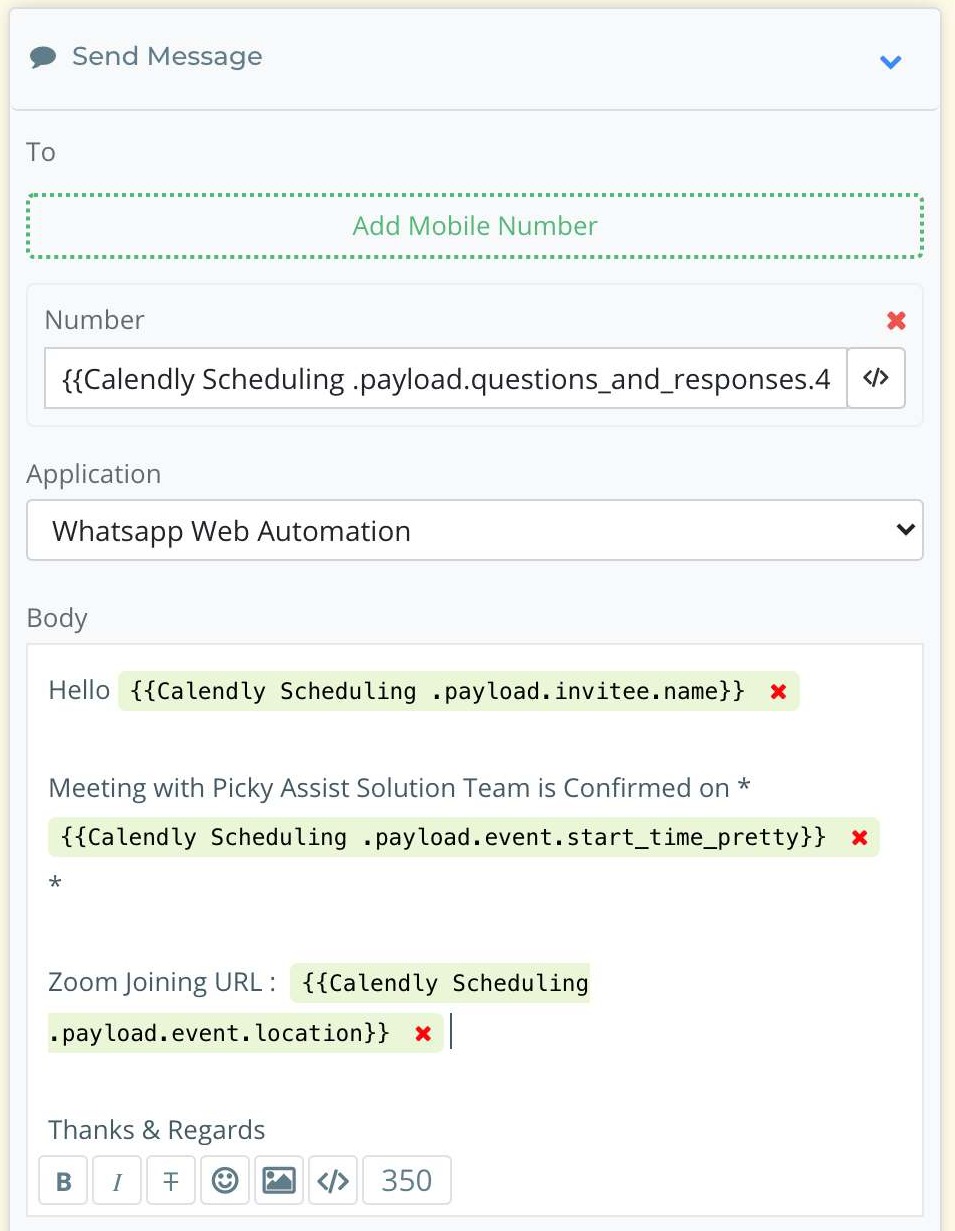
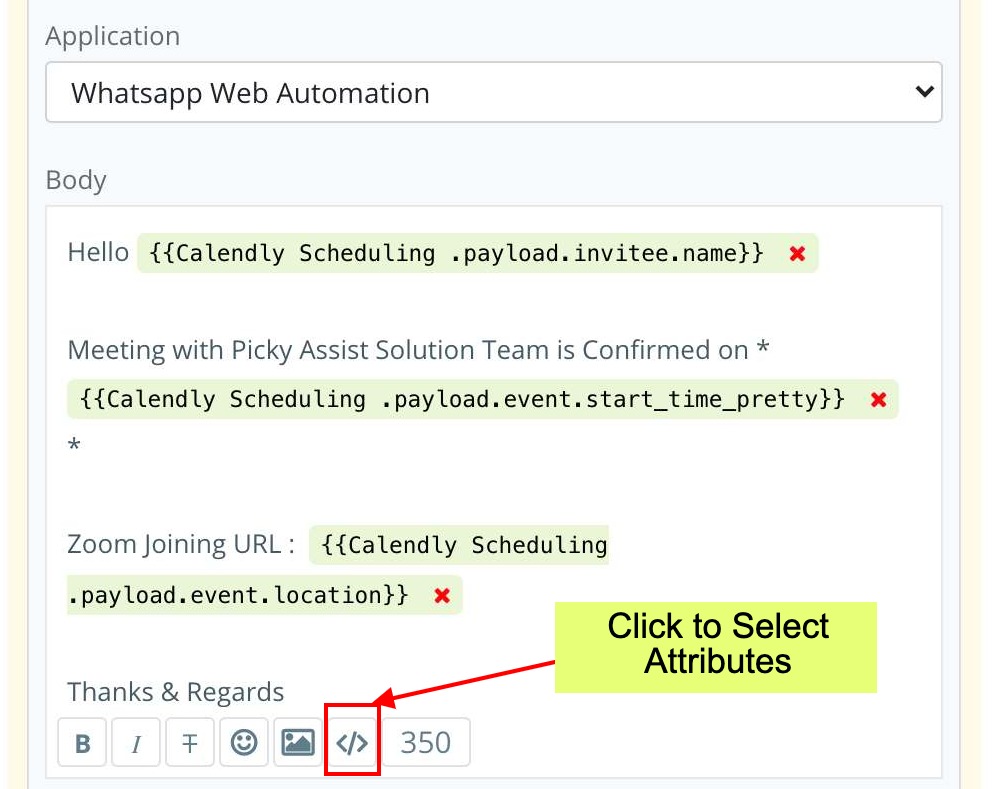
Use the Attribute field to personalise the Messages as shown below;
Make sure you are selecting the attributes from the HTTP Step for sending meeting locations like Zoom Meeting URL, Google Meet etc, for getting the customer email, phone, question, and answer you need to use of the attribute from the Webhook
Sending Reminders
We have created a step in the Connector which sends a Meeting Confirmation message via WhatsApp whenever a new meeting is scheduled in your Calendly, now let’s explore how to send reminders to your customers to minimise the NO SHOW.
Let’s create a new Step and name it “Reminder Before 30 Minutes” then enable the Delay & Action for the step as shown below;
Setting Up Delay
Now click on Delay then Select “Custom” and select Execute Before 30 Minutes of ___ Date as shown below;
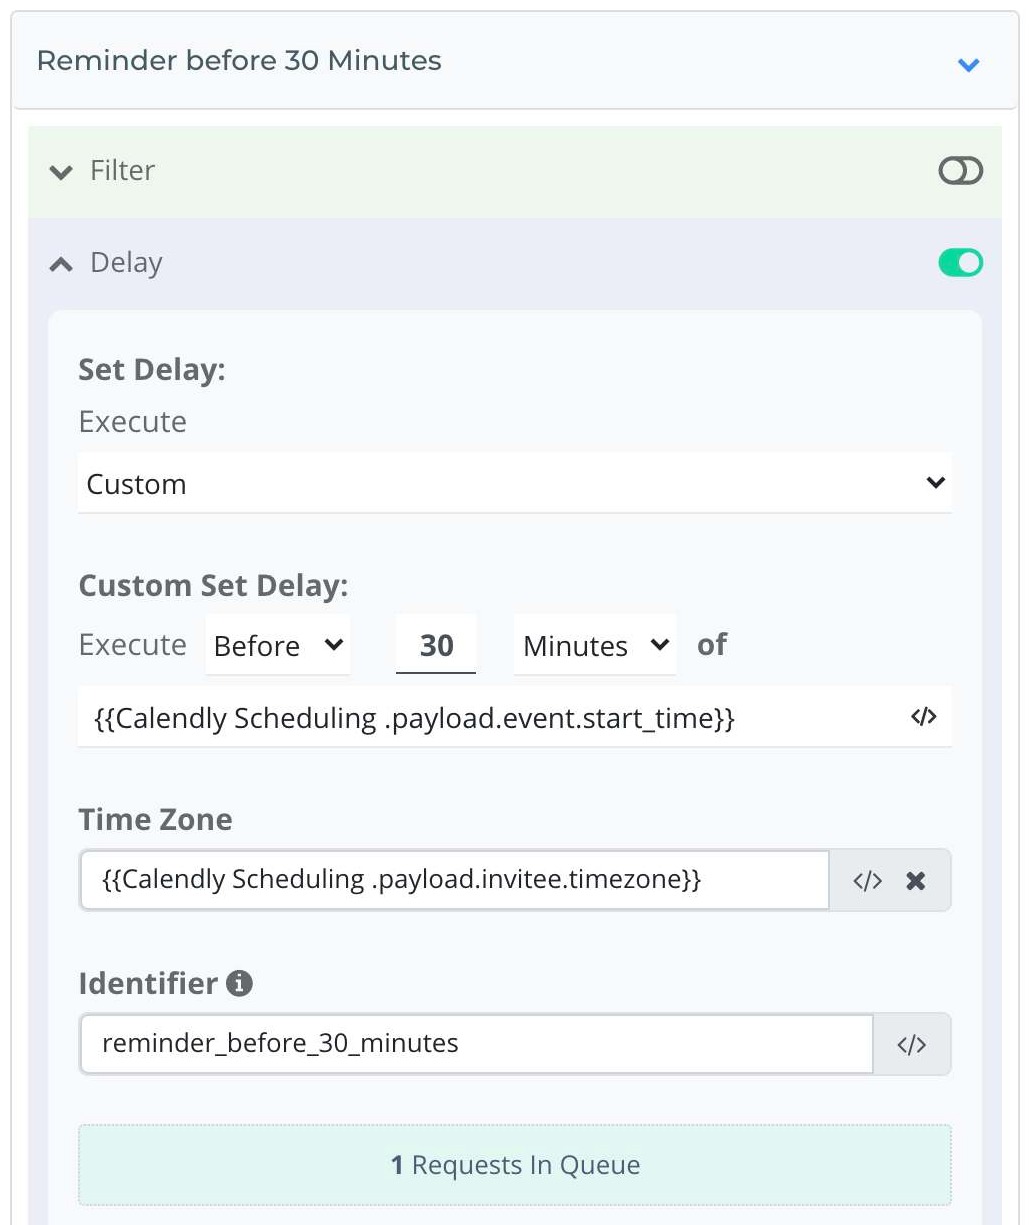
Identifier : If you would like to stop sending all follow-up messages or reminders when an event is cancelled then you must use the “Identifier” feature along with the “Cancel Delay” action of the Connector, for this you need to select the Identifier as the meeting unique id.
Live Event Feeds & Chat Assignment
If you are using Picky Assist Teambox then it’s possible to add the Calendly meeting event directly into the Teambox against the Contact and assign the chat to a department or users in the Teambox to take action. Read More about Live Event Feed & Chat Assignment

Advanced Features
If you want to achieve advanced features like Sending the Message in a different language based on customer language preference, sending an automatic follow-up after 2 days from the Meeting Date etc kindly refer to the below guides;


Add comment